Jay Eatz
  • Home
  • Blog
  • About
  • Contact

So I Smoked My First Brisket.......

8/6/2020

4 Comments

 
I recently acquired my first smoker and have been smoking meat almost every other day. There is something about hanging outside on a nice summer's day and tending to the smoker, keeping the temperature at just the right degree and the smoke steadily flowing. After trying smoked burgers and reverse seared smoke steaks (www.jayeatz.com/blog/so-you-want-to-up-your-steak-game-try-reverse-sear-smoked-prime-rib-steak) I felt up for a more challenging smoke. To me the holy grail of smoked meats has always been the beef brisket. As Canadian Beef puts it: 
A growing trend in Canada is the slow cooking movement. An application of slow cooking is the American BBQ. In the United States, BBQ is a bit of a cult and the king of the BBQ is the brisket. There are national competitions and a lot of hype around BBQ with many different recipes for BBQ brisket. - canadabeef.ca/carcass/#brisket
The BBQ cult has captured me and I feel the hype of the smoked beef brisket. The sheer size of a full brisket, often 12-18 pounds, and the time to smoke it, 8-16 hours can be a little intimidating, but the end result is the thing meat dreams are made of. 
Beef in the meat counter at the butcher shop
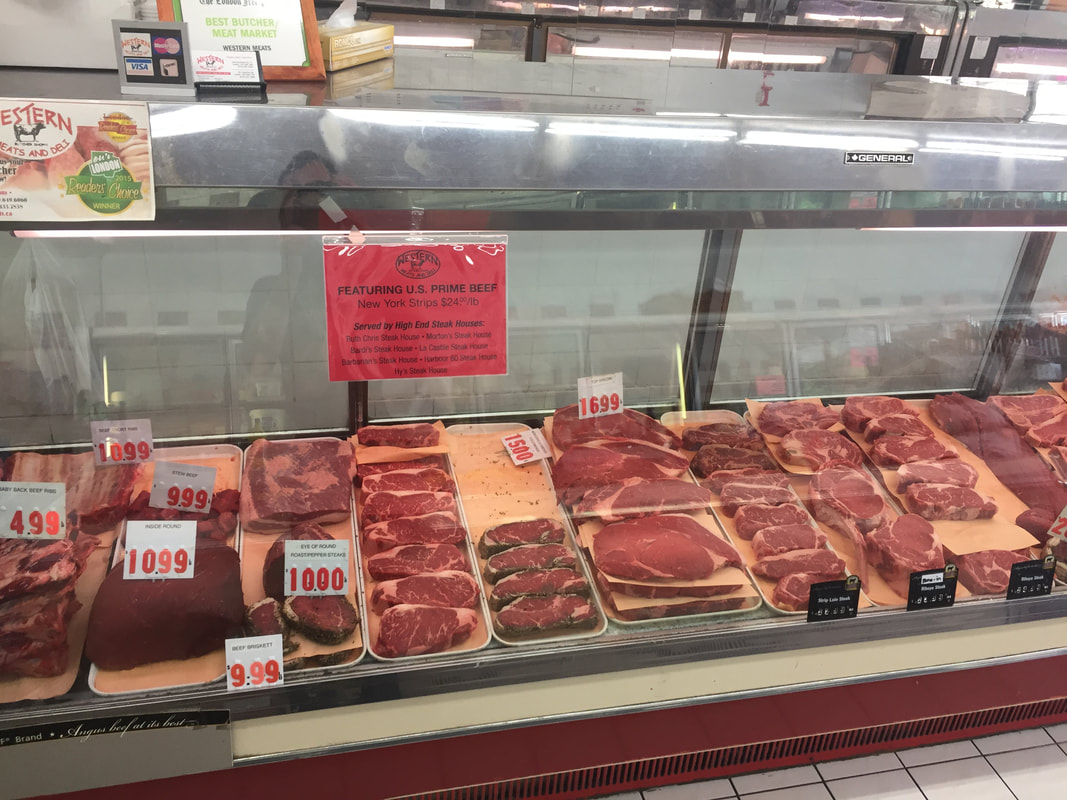
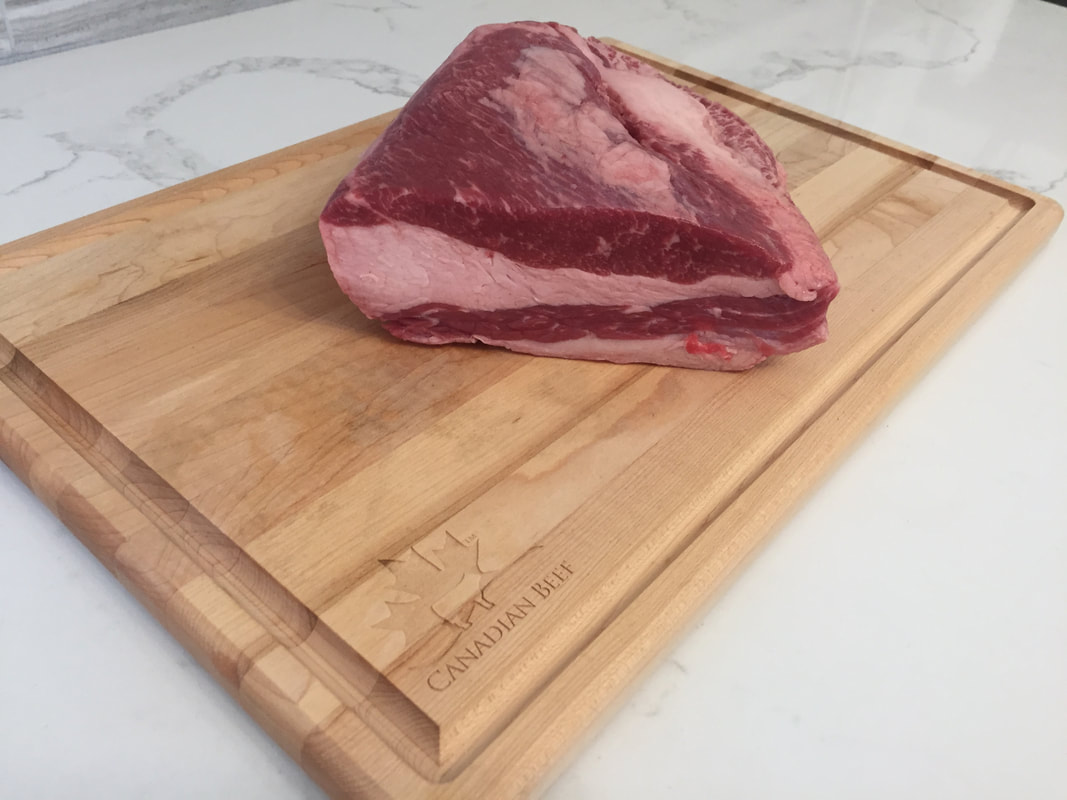
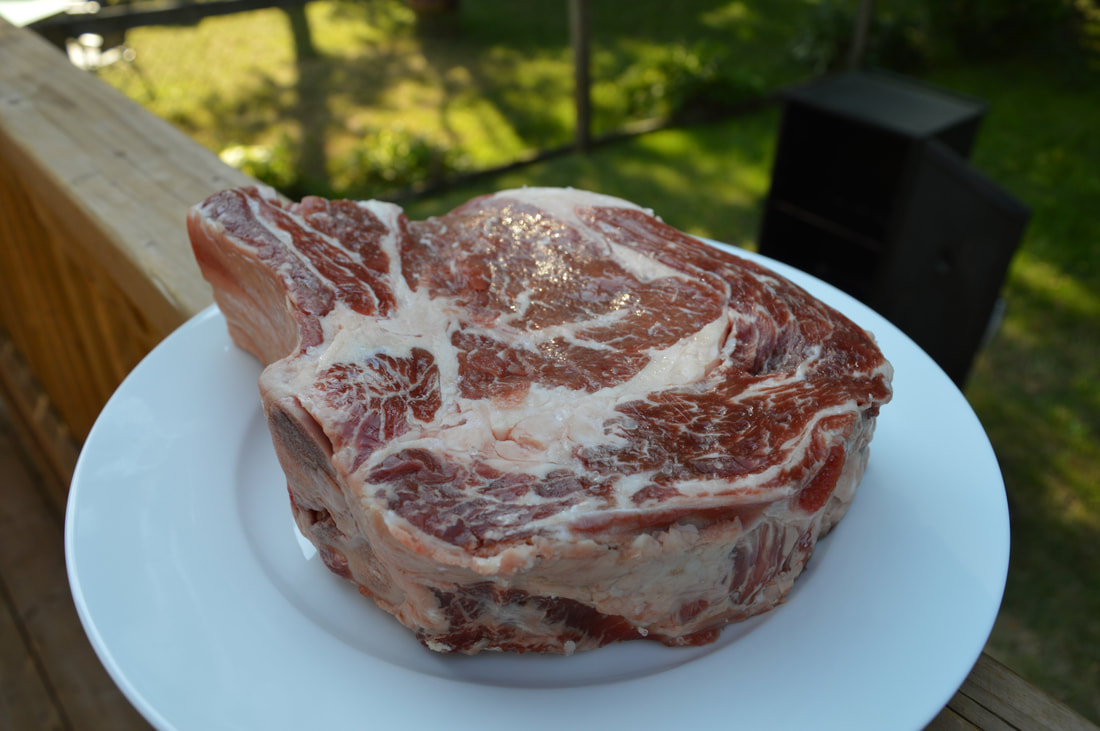
Beef brisket may not be a cut of beef readily available at the grocery store. I went to my local butcher shop to pick one up. Beef brisket is made up of two muscles. The fatty muscle, the pectoralis superficialis, (a.k.a the point) and the leaner muscle, the pectoralis profundus (a.k.a the flat). I decided on a 4 lb cut from the point of the beef brisket mainly because I wanted the flavour that the fattier cut would deliver and I was only feeding 3 people so a whole brisket would have been a little much for my dinner party. A good measure of thumb is to purchase a 1/2 lb of beef per person but consider a shrinkage factor when smoking beef brisket and aim for 1 lb per person precooked weight. 
Beef brisket on a cutting board
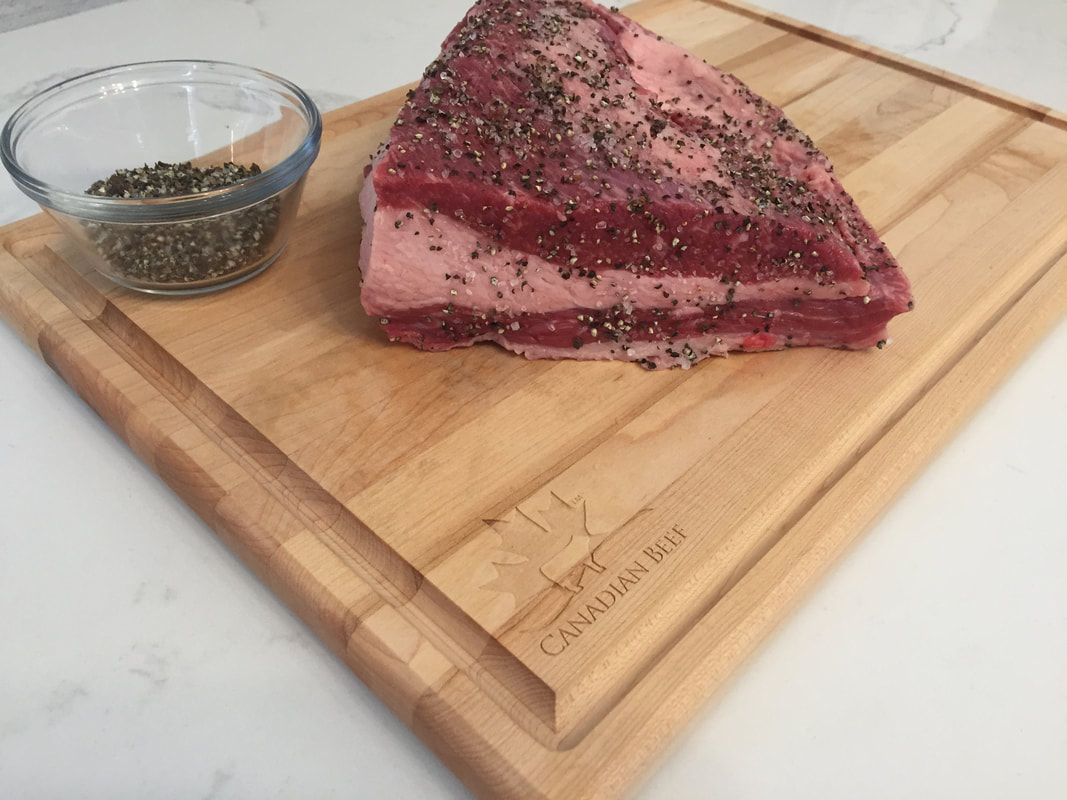
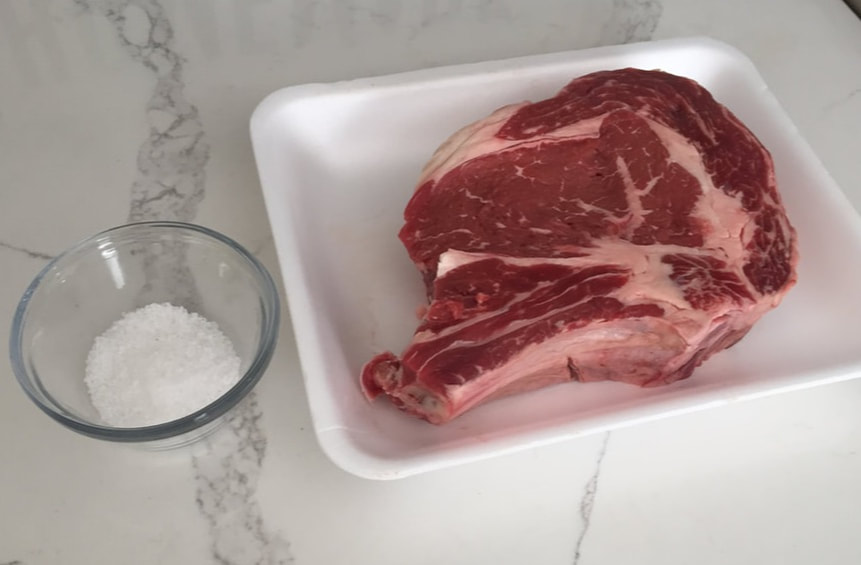
I decided to try a try a Texas style smoked brisket. This style of cook truly showcases the flavour of the beef relying only on salt and pepper to season the roast. Don't get me wrong, you could get really creative with a complex rub that might include 10 or 15 different spices but sometime keeping it simple will deliver the best results.
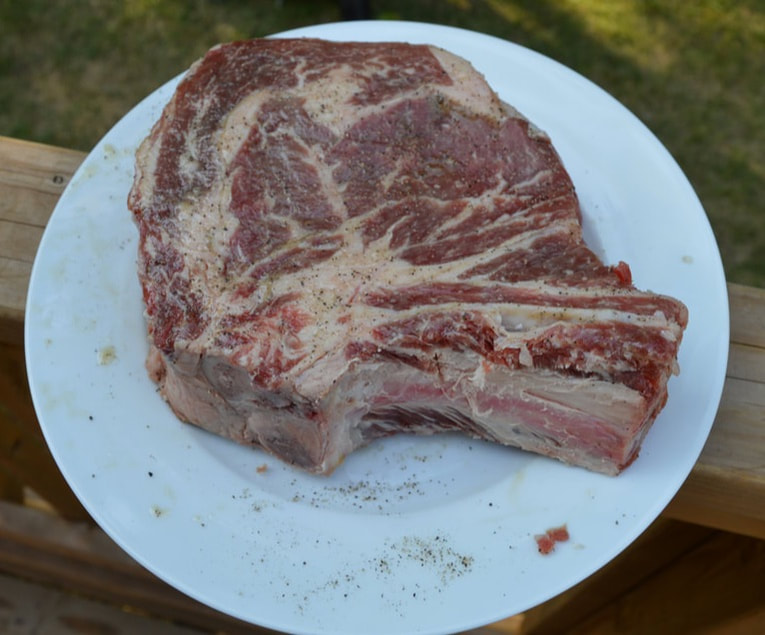
​To prepare the rub combine equal parts of kosher salt and black pepper in a container with a lid. I mixed a 1/4 cup of each together and had left over for a future smoke. Sprinkle a generous amount of the rub on all sides of the brisket but do not go overboard. You will also want to shake the rub occasionally as you sprinkle it on the brisket as the heavier salt tends to settle to the bottom of the container. 
Beef brisket with a salt and pepper rub
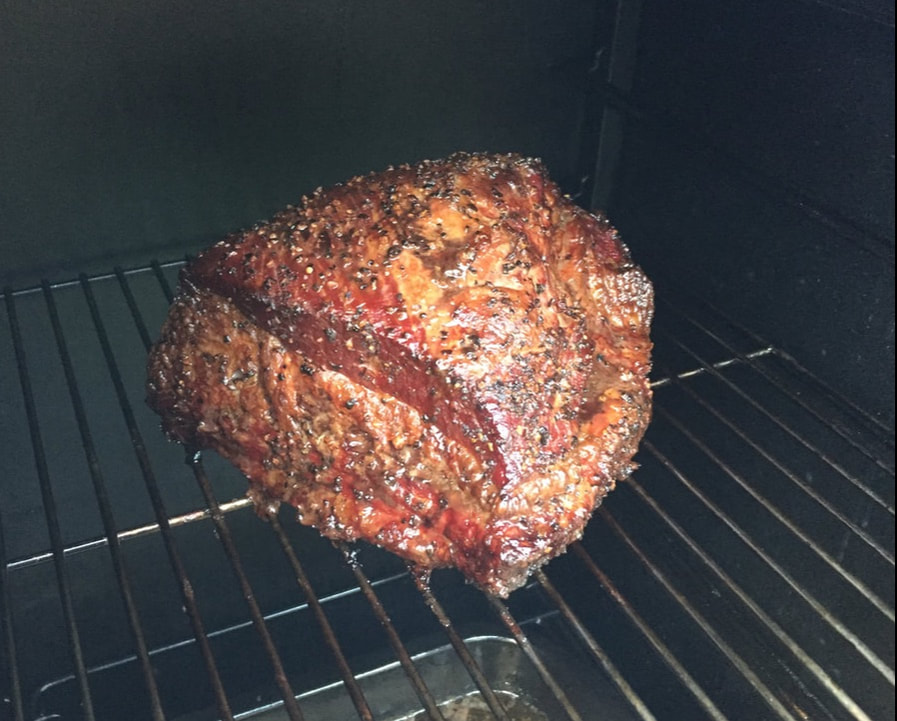
I returned my rubbed brisket to the fridge while I prepped my smoker. For the wood I decided to go with Oak wood which is the traditional wood they would choose in Texas. My smoker has a built-in water pan which I filled with 1 inch of warm water. The water pan will help the cooking chamber maintain an even heat, keep the meat moist and help the smoke adhere to the meat. If your smoker does not have a water pan just add an inch or so or warm water to an aluminum disposable pan and place it under the grilling rack where you intend on placing the brisket. I preheated my smoker to 225 F and added my wood chips.
Beef brisket just entering the smoker
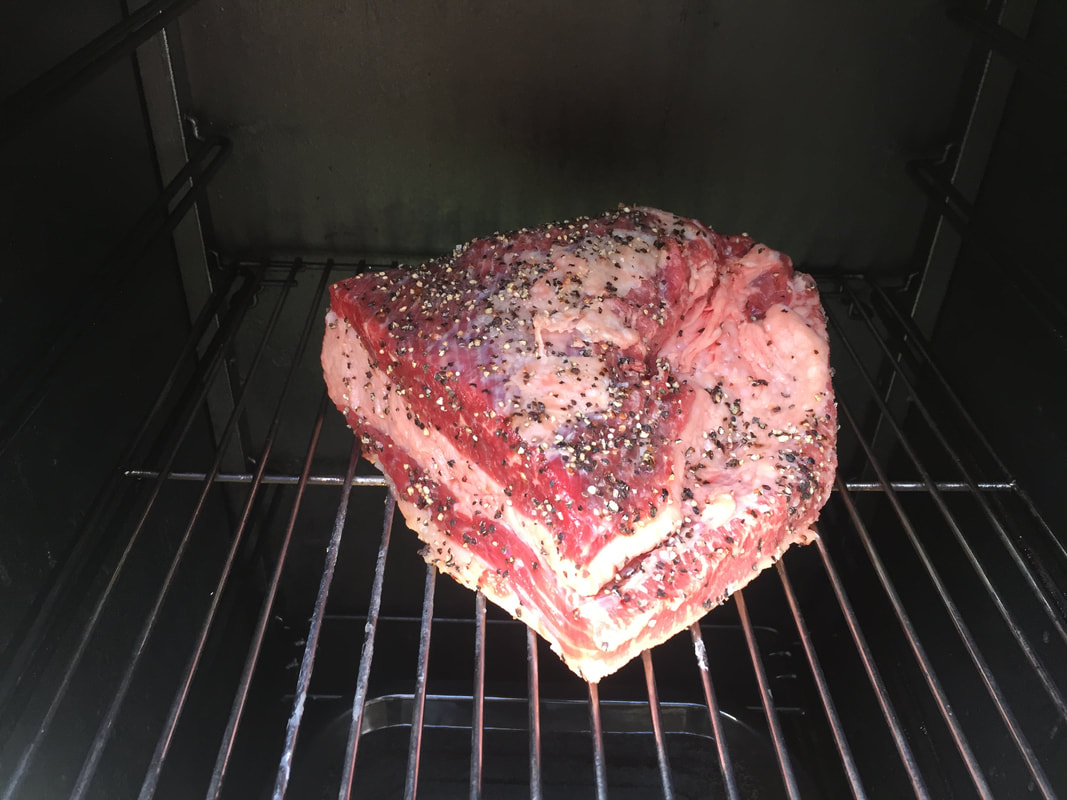
There seems to be a debate within the BBQ community around fat side up or down when it comes to placing your brisket on the cooking rack. I have a vertical smoker and decided to place my brisket fat side down as the heat source is directly below the rack. The reverse is recommended if you have an offset smoker where the heat source is off to the side. Place your brisket fat side up if this is the type of smoke you have. 
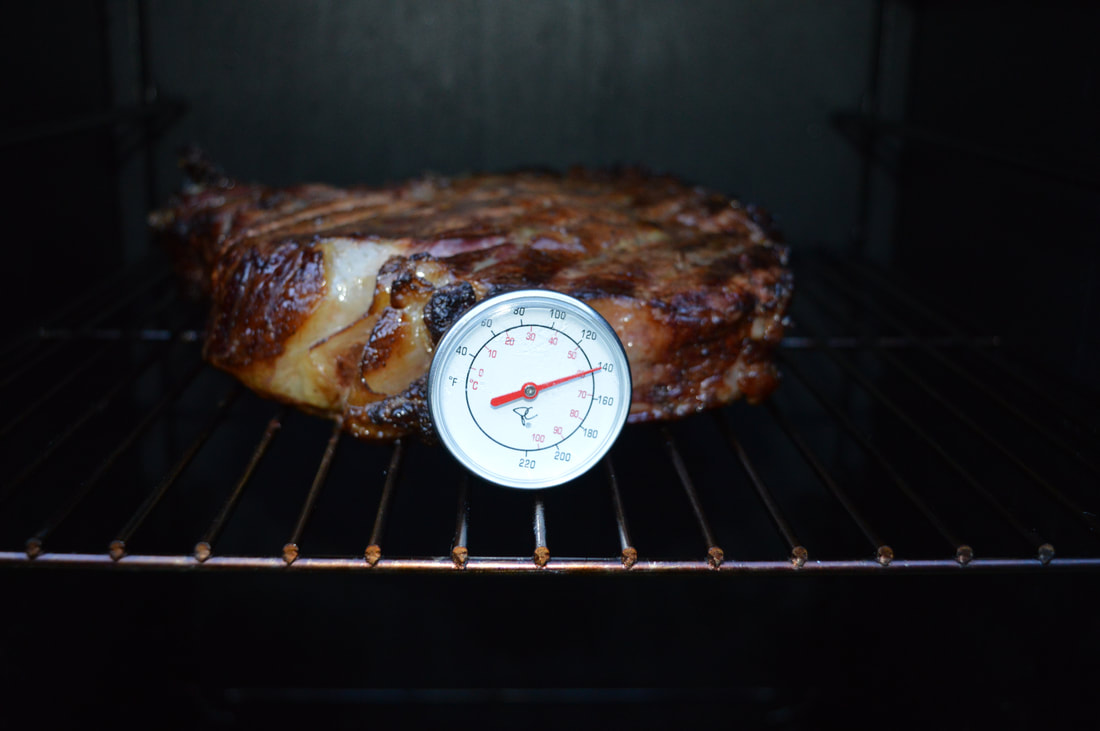
Now the waiting game begins. Some online research may suggest that a brisket will take 1.5 hours per pound at 225 F. This suggests my 4 lb brisket should take about 6 hours to be done. The key to smoking meat is low and slow. Temperature is king and time is only a good judge for when to insert the thermometer into the meat. Your brisket should be finished once it reaches an internal temperature of 200 F - 204 F. As your meat progresses a good idea is to spritz it with liquid to keep it moist and to help the smoke stick to it. I used a spray bottle with beer (but water or apple cider or juice is a suitable substitute) and sprayed every 30 minutes or so after the 2-hour mark. 
Beef brisket just before the stall
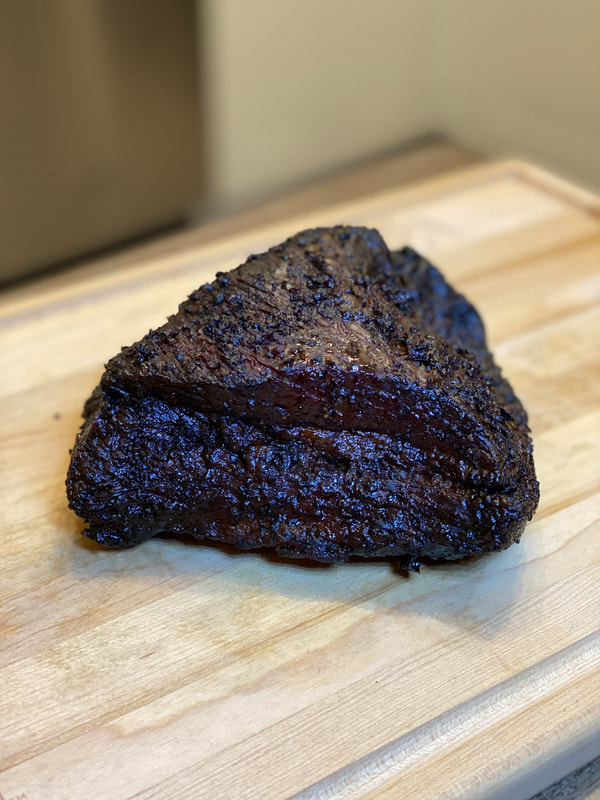
About 5 hours in to my supposed 6 hour smoke my brisket was hovering around 165 F. I had hit a phenomenon know as the brisket stall. This can occur when cooking meat low and slow with such methods as smoking. This is caused by an evaporative cooling effect from the moisture within the brisket (and the fat) escaping which in turn cools the surface of the brisket until the moisture escapes. This can take hours to overcome but eventually will pass. A quick cure to overcome the dreaded stall is called the "Texas Crutch". Simply put remove the brisket from the smoker once it reaches 165 F and tightly wrap in in aluminum foil and return it to the smoker. At this point the brisket is done absorbing the flavours from the smoking wood chips so it is not really important to maintain a good smoke level but rather to maintain a steady temperature. Check your brisket periodically until it reached the optimal internal temperature of 204 F (for me this happened 4 hours later, 9 hours into my 6 hour smoke.....). Once it is within 3 or 4 degrees of the 204 F target remove the brisket from the smoker and let it rest for 45 minutes to an hour. Letting the brisket rest will help the juices of the brisket solidify somewhat, keeping the brisket moist and locking in the flavour from the hours you just dedicated to preparing this cut of beef on the smoker.
Smoked beef brisket prior to slicing
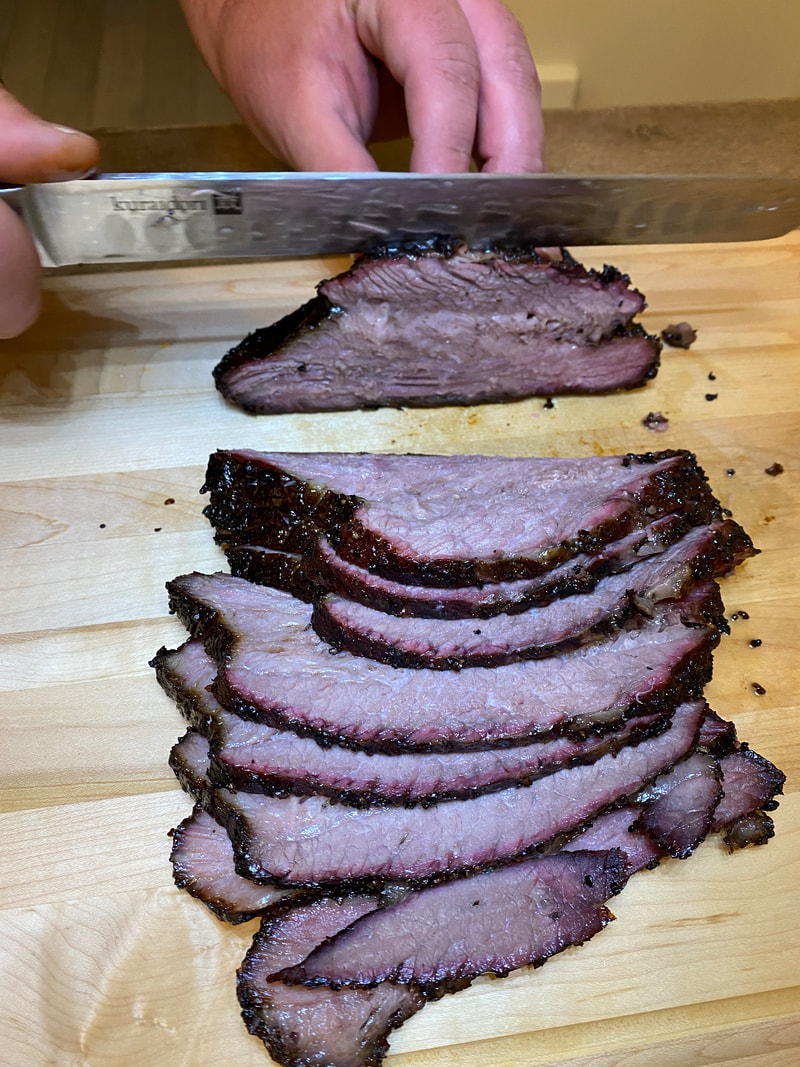
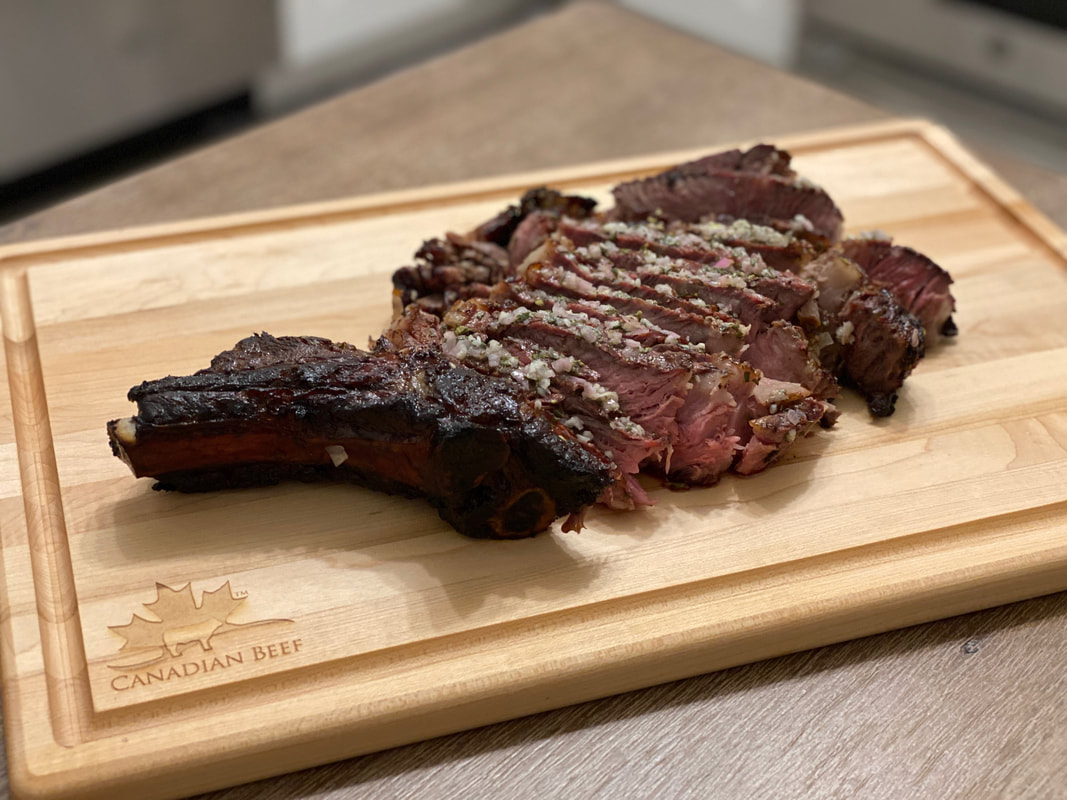
Once rested slice the brisket against the grain (this is a little more tricky with the brisket point as the two muscles converge in opposite directions, since my roast was smaller I didn't bother separating the two muscles and slicing each in opposite direction).
Slicing smoked beef brisket
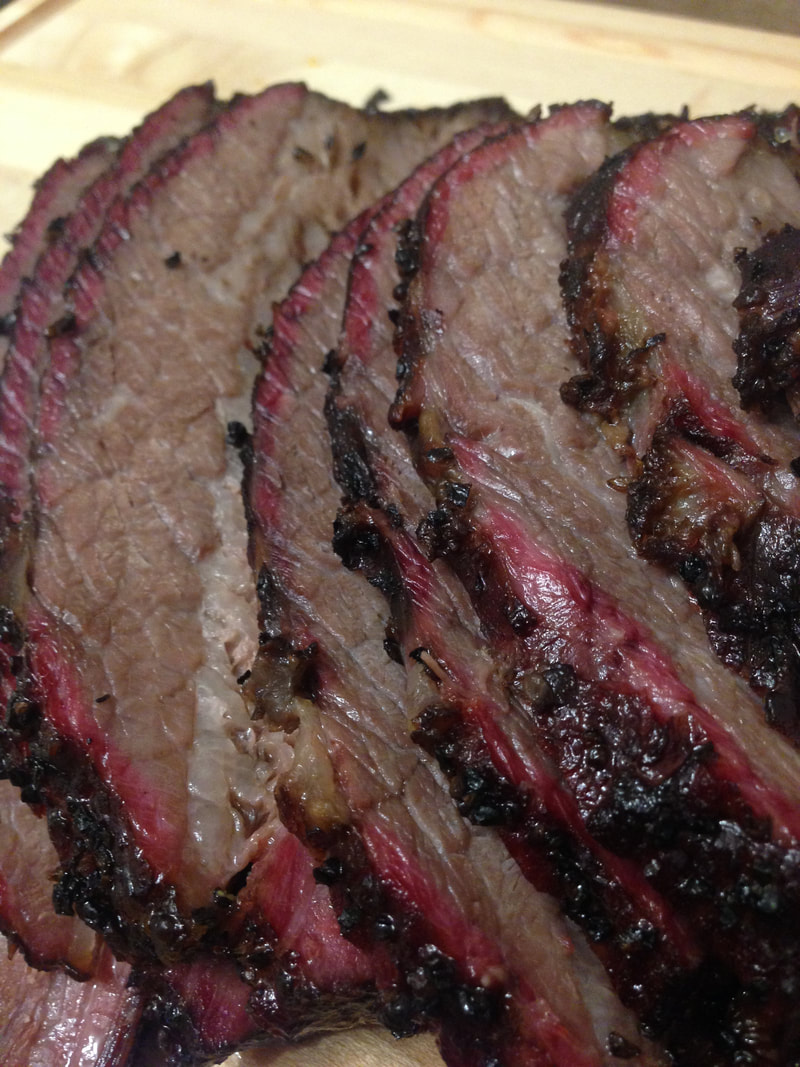
If things go well, you should have a beautiful smoke ring on the outer edge of your brisket. This is one of those things' judges look for in those brisket competitions mentioned at the beginning of this article and is considered a defining factor to whether the brisket is cooked well. Once again one of those things that meat dreams are made of.
Smoke ring on beef brisket
Hopefully, you have enjoyed #MyCanadianBeef take on smoked beef brisket. Let me know how yours turned out in the comments bellow.
4 Comments

So You Want To Up Your Steak Game, Try Reverse Sear Smoked Prime Rib Steak.......

8/5/2020

2 Comments

 
I recently acquired a smoker and decided to take my backyard steak game to the next level. The method, reverse sear smoked steak. It takes a little bit longer than heating up the grill and tossing your steak on, but the outcome is worth it. The finished product is an evenly cooked steak with a little bit of char on the outside. Rather than cooking your steak from the outside in this method flips the traditional grilling method inside out. The steak is first cooked (in this case smoked) low and slow and is pulled from the smoker right around the final desired temperature of your finished steak. Then the steak is placed on a high heat grill to add some char marks and finish off the last few degrees of the final cook. I have invited friends over and they have all said, "This is the best steak I've had in my life".
Picture
The first step to the perfect reverse seared smoked steak is to pick a thick steak. I decided to go with a 1.5-inch bone in rib eye steak (truth be told it was more of a prime rib roast than a steak). Thickness matters for this cooking method. A thin steak will turn out dry if you do not pull it off the smoker at the exact right moment. I have learned it is better to carve a thick steak and share it with your guest rather than try to serve everyone an individual steak. It also makes for a nice presentation when served on a platter or a cutting board family style.
The method is very simple. A few hours before getting the smoker prepped lightly sprinkle your steak with some kosher salt and place the steak in the fridge.
Picture
Pre heat your smoke to 225-250 F. If your smoker has a water pan add an inch of hot water to it just as your pre heat the smoker. If it does not have a water pan use a disposable tin foil pan with an inch of hot water in it, placing in directly under the area where you will place your steak. The water will help regulate the temperature creating an even cooking environment in your smoker as well as helping the smoke stick to your meat. When the smoker almost reaches the temperature add your wood chips. I decided to use whiskey barrel wood chips (Oak) with a little mesquite chip mix. Just before placing the steak in the smoker lightly rub some olive oil on it and season with black pepper. I placed my steak almost right from the fridge onto the smoke. There is no need to bring your steak up to room temperature for two reasons. The smoke tends to stick better to the cool steak and you can keep food safety a priority by not letting your steak sit in the danger zone growing potentially harmful bacteria while you wait for it to acclimatize to room temp.
Picture
Place your steak on the middle rack of your smoker and maintain the smoke and 225-250 F temperature for about 90-minutes to 2 hours. I was going for a medium rare to medium cook. I pulled the steak once it hit 140F checking with a meat thermometer every so often after the 90 minute mark. Try to place the meat thermometer in the middle of the steak (keeping it away from the bone) to get the most accurate reading. A digital probe style thermometer can be a useful tool when smoking because every time you open the door or lid of your smoker you will let the heat out and it will take time for the temperature to return to where it was. As the saying goes "if you're looking then you're not cooking".
Picture
Around the 90-minute mark I preheated my propane grill to a high heat (approximately 500 F). Once the steak hit my desired temperature, I transferred the steak to the grill and seared each side for about 4 minutes per side. I decided to top my steak with a compound butter. (Find the recipe here: www.jayeatz.com/blog/so-you-want-to-up-your-steak-game-try-making-compound-butter)
I sliced the compound butter into medallions and topped my steak with it the last minute before I took it off the grill allowing it to slightly melt.
Picture
Then I let the steak rest for 15 minutes, allowing the compound butter to further melt, and the juices of the steak to redistribute back into the steak before slicing. 
Picture
I decided to pair the steak with fried mushrooms and a kale salad recipe I discovered on the ROUNDUP app from Canadian Beef canadabeef.ca/recipes/beer-soaked-beef-rotisserie-roast-with-skillet-corn-kale-salad/.
Picture
Wow your friends with a reverse sear smoked prime rib steak at your next backyard cookout. 
2 Comments

So You Want To Up Your Steak Game? Try Making Compound Butter.......

8/4/2020

2 Comments

 
Are you looking to elevate your next backyard BBQ steak to that steakhouse quality steak? A quick and easy way to finish that steak off and bring it to the next level is by simply topping it with a little homemade compound butter right at the end.
What is compound butter you ask? Simply put it is  a mixture of butter and other ingredients. These other ingredients are whipped into the butter, reformed in plastic wrap, chilled, and then melted onto meats (steak in this case) or into various sauces. It is relatively simple to make and infinite combinations of flavours can be added to the butter to compliment whatever meat you are serving.
butter and herbs on a platter
Since I was making steak, I decided to infuse flavours that would complement steak into my compound butter such as rosemary, garlic and shallots. Here is what you will need:
Ingredients:
  • 1/2 cup of salted butter (1 stick) room temperature 
  • ​2 TBSP minced garlic 
  • 2 TBSP finely chopped rosemary
  • 2 TBSP diced shallot
  • 1 TBSP white wine vinegar
Directions:
Place room temperature butter in a small mixing bowl. Mix all ingredients thoroughly into the butter.
Ingredients in a mixing bowl

Read More
2 Comments

So Ma Dukes And I Checked Out The Church Key Bistro Pub In London Ontario.......

3/6/2018

4 Comments

 
     It seems every time I get tickets to a concert Ma Dukes ends up joining me. This time it was Chicago and Earth, Wind and Fire and the pre-concert dinner was at The Church Key Bistro Pub in downtown London, Ontario. 
Exterior of The Church Key Bistro Pub
     The Church Key Pub is located on 476 Richmond St. across from the Grand Theatre and only a few blocks away from Bud Gardens making it the ideal spot to  dine before an event. It is a welcoming and warm space and gets busy when events are happening downtown but lucky enough we were able to get a table for two.
     We were seated and we began to decide what we should order. I gave the beer menu a once over and could not believe how reasonably priced the Church Key's beers are. A 10 oz draft started at $3.75 (and have only gone up to $4.10 after the minimum wage increase), keep this in mind when considering a place downtown to go to for drinks. We ordered drinks and appetizers, Ma Dukes went with the soup and I opted for the mussels steamed with leeks and lager beer. A massive loaf of bread with house blended butter also made its way to our table.
     The mussels were excellent, steamed to perfection in beer just like the ones I make at home. They also offer a baked version in a white wine cream sauce that I will have to return and try. Ma Dukes liked her soup and the loaf of bread and butter was so good we asked for another loaf.
     Now for the main course I decided on the Church Key burger with a Caesar side salad and Ma Dukes went with the fish and chips.
close up of the Church Key Burger
     Ma Dukes is British and a bit of a fish and chips aficionado and she gave her order the two thumbs up. I have been know to eat a few burgers myself and really enjoyed the Church Key burger. The patty was made in house and was topped with caramelized onions and Stilton cheese which added some bite to the burger. The Caesar salad was a great choice after eating all the bread from the appetizer round as well as the bun from the burger.
     The service was excellent just like the food. Surprisingly the prices are also very reasonable too. Some of the neighbouring dinning establishments in the area are known for their expensive prices and through my assumptions I placed the Church Key into the same category. Totally not the case, the fish & chips are only $17.50 and the burger was only $18.50. A visit to a chain restaurant these days will run you a similar bill (more if you are ordering beer).
     Jay Eatz definitely recommends the Church Key Bistro Pub downtown London. Elevated pub fare at reasonable prices, cheap beer and a great chance to support a local downtown business by shopping local.
The Church Key Bistro-Pub Menu, Reviews, Photos, Location and Info - Zomato
4 Comments

So I Made The G.F. Beef Wellington For Valentines Day.......

2/13/2018

2 Comments

 
Unsliced cooked beef wellington
     Years of watching Hell's Kitchen had finally influenced me to give Gordon Ramsay's Beef Wellington a try. After a little researching online I came across this recipe from an apparent insider who worked on the set of Hell's Kitchen and reviled how this infamous dish is made (www.popsugar.com/food/Gordon-Ramsay-Beef-Wellington-Recipe-486092). What better time to give this recipe a go than on Valentines Day right? Why not pair it with Lobster Risotto and Beef Carpaccio? What a great Valentines Day kitchen challenge sure to leave your significant other impressed. Here is what you will need to make the Beef Wellington portion of this meal happen.

Read More
2 Comments

So There Is A Hotel With A View In Carriacou.......

12/12/2017

2 Comments

 
     A trip to Grenada wouldn't be complete without a visit to Carriacou.  This was my second time on the Island and having learned a lesson from my first visit 5 hours really isn't enough time to truly experience the Island (Check out Jay Eatz's first visit to Carriacou here: www.jayeatz.com/blog/so-youre-hungry-in-carriacou).  I booked a Tobago Cays excursion with Isle of Reefs Tours and although possible during a day trip to Carriacou some of the extras we got to do would have been dropped off the itinerary.  In order to maximize our time in Carriacou and squeeze in the excursion and some time at Paradise Beach the following day we knew an overnight stay was in order.   After some searching online for a hotel in Carriacou, the Mermaid Hotel really seemed to fit our needs.
front exterior Mermaid Hotel in Carriacou
     The Mermaid Hotel located in Hillsborough, the largest town in Carriacou.  Everything you could possible need is located within a 5 minute walk.  Grocery store, pharmacy, bars and restaurants, even better yet the Mermaid Hotel is also home to the Callaloo Restaurant & Bar.  Another bonus is if you are arriving by ferry you can walk to the hotel (no taxi needed).

Read More
2 Comments

London Home Economics Holiday Cooking Class.......

11/23/2017

1 Comment

 
     Jay Eatz was lucky to be invited to instruct this special edition of "Casserole Cooking Class" with the London Home Economics Association.  First of all a big thank you to Maja and her team for putting together such a fun evening.  It was great to network with LHEA and SHEA (Student Human Ecology Association) members.  I always enjoy getting together with future PHEc's.  We were also lucky to have Lisa Mardlin Vandewalle from Grain Farmers of Ontario come and present to us a little about what her organization is up to.  I never new Ontario had 28,000 grain farmers, that's something to be #AgProud of.
      As promised here is the recipes for the four casseroles that we (and when I say we I mean YOU) made. 

Macaroni Pie
Macaroni pie ingredients

Read More
1 Comment

So I Made Chicken Parm.......

11/14/2017

2 Comments

 
chicken parmesan plated with veg
     I made a batch of fresh Calabrese pasta sauce (here is the recipe: www.jayeatz.com/blog/so-this-mangiacake-decided-to-make-pasta-sauce-and-meatballs) last week and to my surprise it had quit the yield.  I got tired of pasta fairly quickly and had to come up with some ways to use it up and chicken parmesan seemed like a great option because it is easy and delicious.   
Easy Chicken Parmesan
Ingredients:
  • Boneless chicken breast (approximately 1 breast per person)
  • Panko bread crumbs
  • 1 egg (per 3 pieces of chicken breast)
  • Parmesan cheese
  • Mozzarella cheese (2 slices per chicken breast)
  • Oil 
  • Pasta Sauce (about 2 cups)

Read More
2 Comments

So I Went Roti Hunting In Barbados.......

11/9/2017

2 Comments

 
Picture
    I would have liked to title this post "So I found the best Roti in Barbados......." but that would be an impossible task to accomplish during a 7 day stay on the Island.  So many restaurants offer this Caribbean delicacy in Barbados, you would almost need to live there for a year and eat Roti daily to really be able to make such a statement. 
     If you are wondering what Roti is well here goes.  Roti actually refers to a type of flat bread originating from India.  This bread is unleavened meaning gas is not added to the dough to make it lighter which results in the Roti bread's dense consistency similar to pita bread.  Traditionally Roti is torn apart and dipped into a curry to sop up the juices and scoop up the meat.  In Trinidad during the 1940's the Roti wrap was born (which I will be talking about).  The curry that the Roti bread would be dipped in was used as a filling inside a Roti wrap which transformed the Roti into a hand held street food which popularity soon spread throughout the Caribbean.  The Roti wrap is simply called Roti.  I will give you my opinion on three different establishments where I got to experience the Bajan take on Roti.
Exterior sign for Chefette Restaurants

Read More
2 Comments

So I Got Invited To Contribute to Eat This Town's Iconic Foods Of Canada: Ontario Edition.......

6/29/2017

2 Comments

 
     A fellow Canadian blogger, Lindsay Nelson (her blog is called Eat This Town) asked me to contribute to a series she is creating about the iconic foods of each province in Canada in honour of Canada's 150th birthday.  I was asked to write a piece about one iconic food from Ontario.  Ontario is such a melting pot of cultures with such an eclectic array of culinary options that it took a moment for my mind to focus on a food that was truly unique to the province. 
     The first thing that popped into my head was BeaverTails.  This culinary delight was born in Ottawa and rightfully calls Ontario its birthplace.  Check out the following link (or click on the photo below) to read the rest of the story and check out Eat This Town to see the rest of the series highlighting each provinces iconic foods.  Happy Canada's Day too eh.
BeaverTails Food Truck
2 Comments

So There Is A New Roadhouse In Town.......

3/14/2017

1 Comment

 
Chucks Road House Exterior Picture
     I don't usually write blog posts about chain restaurants, usually I will save Zomato for my thoughts on a visit to lets say Kelsey's or Montana's.  When I visited Chuck's Roadhouse I discovered they were doing something totally different than the other guys, selling good food at good prices.  I almost want to use the word 'cheap' but the taste of what they serve is far from cheap.  Chuck's really has something good going on and I like it.

Read More
1 Comment

So I Had Breakfast On The Farm.......

3/7/2017

1 Comment

 
Picture
     Last June I had the pleasure of attending Farm & Food Care Canada's Breakfast on the Farm event in my hometown of Woodstock Ontario.  The event took place at Veldale Farms, a dairy farm, which was quit fitting for the host city which also happens to be the Dairy Capital of Canada.  The first 2000 people that RSVP'd to the event received a free breakfast, and 2000 people went.
     They put on one heck of a good breakfast too.  Pancakes, pork sausage, scrambled eggs, fried mushrooms, fresh strawberries, coffee, milk and apple cider.  

Read More
1 Comment

So You're Looking For A Free Breakfast Meal on Your Birthday in Strathroy.......

1/10/2017

1 Comment

 
     That's right I said "Free".  If you find yourself in the metropolis of Strathroy, Ontario and it happens to be your birthday you can score a free breakfast like Jay Eatz did.  Just head to Roy's Coffee Shop and make sure you have some I.D. on you.
Picture
     Roy's Coffee Shop is located on 273 Caradoc S. St. in Strathroy.  I have driven by this place many times on my way to pick up things from Staples or Canadian Tire for work.  It's conveniently located on one of the main arteries in town close to the major business area.  On one of these trips by Roy's the outside sign read "Free Birthday Breakfast".  I took a mental note of this and vowed to return on my birthday to collect my gift.

Read More
1 Comment

So Scalloped Potatoes Don't Have To Be That Hard To Make.......

1/3/2017

1 Comment

 
Picture of ingredients for scallop potatoes
     Have you ever Googled a recipe for traditional scalloped potatoes?  All this talk of making a roux, gradually adding milk to flour and butter, whisking constantly for 8 minutes?  Jay Eatz says forget about it, scalloped potatoes don't have to be that hard.  Don't get me wrong, the traditional way is far from the wrong way but there is a faster and easier way.  This recipe should yield 4 to 6 servings and fill a 2 quart casserole dish.
Easy Scalloped Potatoes
Ingredients:
  • About 4 medium potatoes (depending on size, I used 5 varing sized white potatoes)
  • 1 medium sized onion
  • 2 cans cream of mushroom soup
  • 1 1/2 cups of light cream
  • Salt & pepper to taste

Read More
1 Comment

So I got Invited to Canadian Beef's Taste & Terroir Event.......

11/23/2016

3 Comments

 
Taste & Terroir private event Picture
     You have probably been to a wine tasting but have you ever been to a beef tasting?  Well Jay Eatz had the pleasure of attending Canadian Beef's Taste & Terroir event earlier this fall at the Canadian Food & Wine Institute at Niagara College.  The campus and facilities were the ideal setting for this day's events which would showcase some delicious Canadian Beef paired with some wines from the Niagara Region.  The only thing that trumped the setting was our hosts, two phenomenal chef's, Chef Marty Carpenter, Director of the Canadian Beef Centre of Excellence and Chef Michael Olson, Chef Professor at the Canadian Food & Wine Institute Niagara College, and one amazing Home Economist, Joyce Parslow, Canadian Beef's Director of Consumer Relations.

Joyce Parslow from Canadian Beef speaking to the group at the Canadian Food and Wine Institute retail store Picture

Read More
3 Comments
<<Previous

    Author

    Jay Eatz is passionate about all things food and welcomes you to explore all thing "Eatz" with him. 

    Picture

    RSS Feed

    Categories

    All
    BBQ
    Cooking Classes
    Dessert Recipes
    Recipes
    Restaurant Reviews
    Slow Cooker
    Travel

    Enter your email address:

    Delivered by FeedBurner

    Picture
© COPYRIGHT 2015. ALL RIGHTS RESERVED.