Jay Eatz
  • Home
  • Blog
  • About
  • Contact

So I Smoked My First Brisket.......

8/6/2020

2 Comments

 
I recently acquired my first smoker and have been smoking meat almost every other day. There is something about hanging outside on a nice summer's day and tending to the smoker, keeping the temperature at just the right degree and the smoke steadily flowing. After trying smoked burgers and reverse seared smoke steaks (www.jayeatz.com/blog/so-you-want-to-up-your-steak-game-try-reverse-sear-smoked-prime-rib-steak) I felt up for a more challenging smoke. To me the holy grail of smoked meats has always been the beef brisket. As Canadian Beef puts it: 
A growing trend in Canada is the slow cooking movement. An application of slow cooking is the American BBQ. In the United States, BBQ is a bit of a cult and the king of the BBQ is the brisket. There are national competitions and a lot of hype around BBQ with many different recipes for BBQ brisket. - canadabeef.ca/carcass/#brisket
The BBQ cult has captured me and I feel the hype of the smoked beef brisket. The sheer size of a full brisket, often 12-18 pounds, and the time to smoke it, 8-16 hours can be a little intimidating, but the end result is the thing meat dreams are made of. 
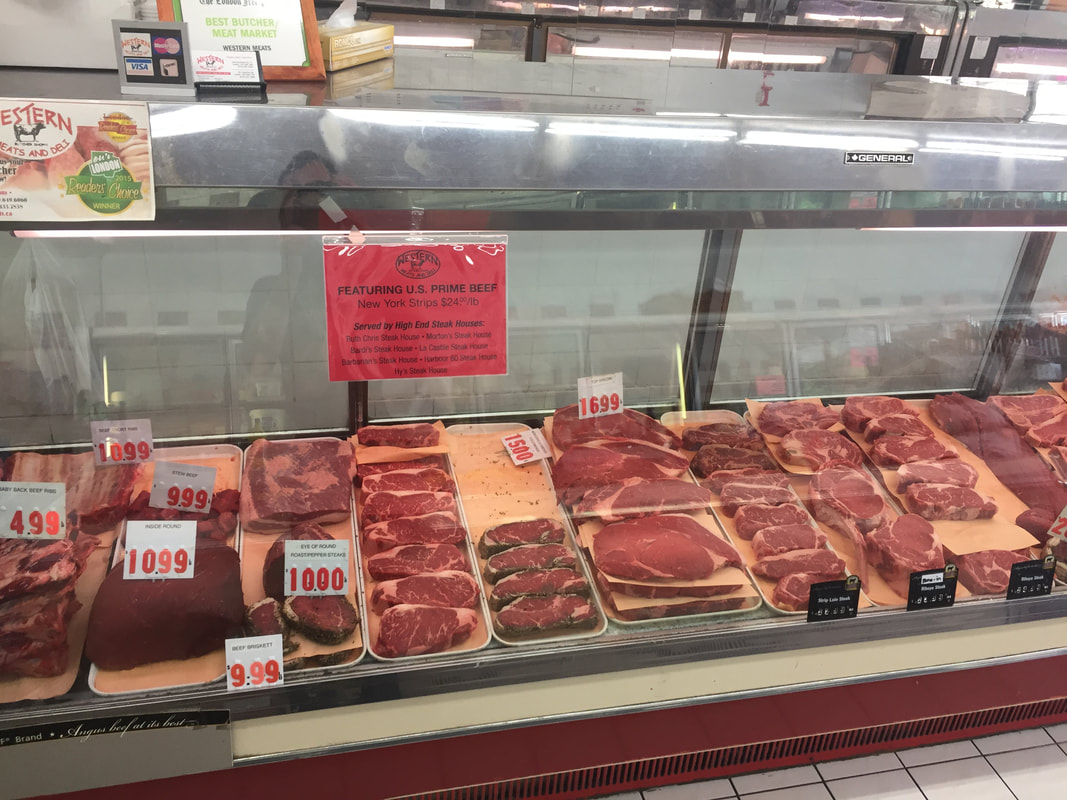
Beef in the meat counter at the butcher shop
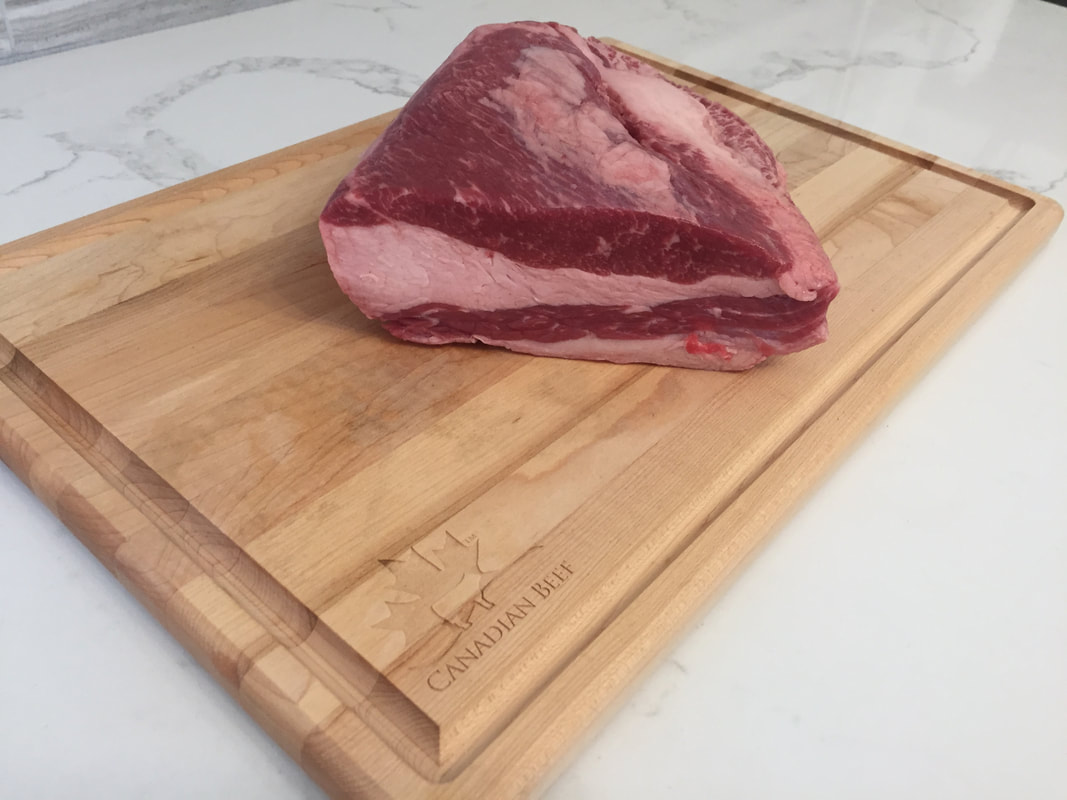
Beef brisket may not be a cut of beef readily available at the grocery store. I went to my local butcher shop to pick one up. Beef brisket is made up of two muscles. The fatty muscle, the pectoralis superficialis, (a.k.a the point) and the leaner muscle, the pectoralis profundus (a.k.a the flat). I decided on a 4 lb cut from the point of the beef brisket mainly because I wanted the flavour that the fattier cut would deliver and I was only feeding 3 people so a whole brisket would have been a little much for my dinner party. A good measure of thumb is to purchase a 1/2 lb of beef per person but consider a shrinkage factor when smoking beef brisket and aim for 1 lb per person precooked weight. 
Beef brisket on a cutting board
I decided to try a try a Texas style smoked brisket. This style of cook truly showcases the flavour of the beef relying only on salt and pepper to season the roast. Don't get me wrong, you could get really creative with a complex rub that might include 10 or 15 different spices but sometime keeping it simple will deliver the best results.
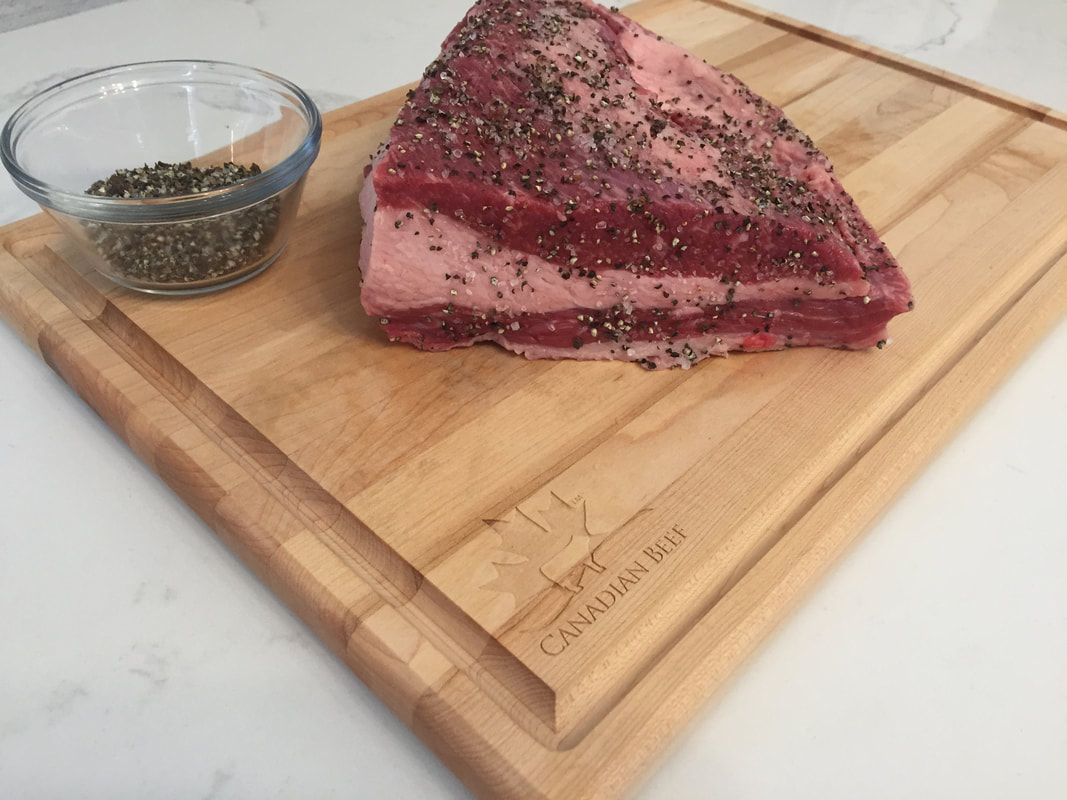
​To prepare the rub combine equal parts of kosher salt and black pepper in a container with a lid. I mixed a 1/4 cup of each together and had left over for a future smoke. Sprinkle a generous amount of the rub on all sides of the brisket but do not go overboard. You will also want to shake the rub occasionally as you sprinkle it on the brisket as the heavier salt tends to settle to the bottom of the container. 
Beef brisket with a salt and pepper rub
I returned my rubbed brisket to the fridge while I prepped my smoker. For the wood I decided to go with Oak wood which is the traditional wood they would choose in Texas. My smoker has a built-in water pan which I filled with 1 inch of warm water. The water pan will help the cooking chamber maintain an even heat, keep the meat moist and help the smoke adhere to the meat. If your smoker does not have a water pan just add an inch or so or warm water to an aluminum disposable pan and place it under the grilling rack where you intend on placing the brisket. I preheated my smoker to 225 F and added my wood chips.
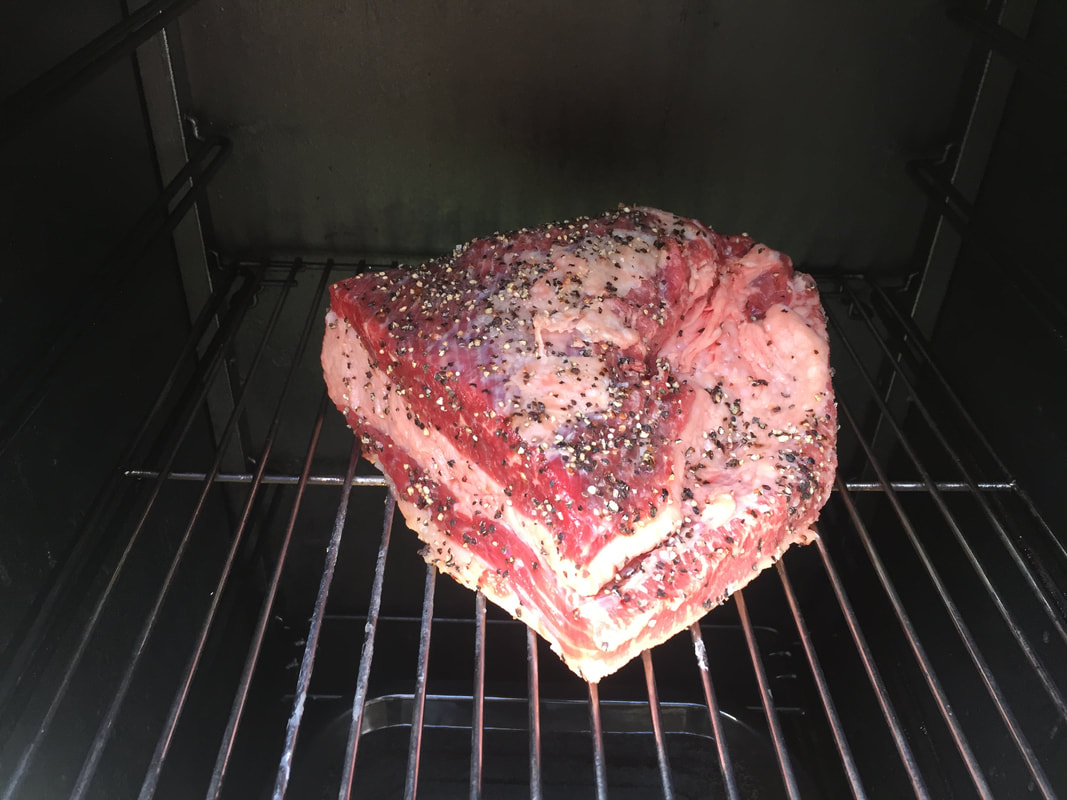
Beef brisket just entering the smoker
There seems to be a debate within the BBQ community around fat side up or down when it comes to placing your brisket on the cooking rack. I have a vertical smoker and decided to place my brisket fat side down as the heat source is directly below the rack. The reverse is recommended if you have an offset smoker where the heat source is off to the side. Place your brisket fat side up if this is the type of smoke you have. 
Now the waiting game begins. Some online research may suggest that a brisket will take 1.5 hours per pound at 225 F. This suggests my 4 lb brisket should take about 6 hours to be done. The key to smoking meat is low and slow. Temperature is king and time is only a good judge for when to insert the thermometer into the meat. Your brisket should be finished once it reaches an internal temperature of 200 F - 204 F. As your meat progresses a good idea is to spritz it with liquid to keep it moist and to help the smoke stick to it. I used a spray bottle with beer (but water or apple cider or juice is a suitable substitute) and sprayed every 30 minutes or so after the 2-hour mark. 
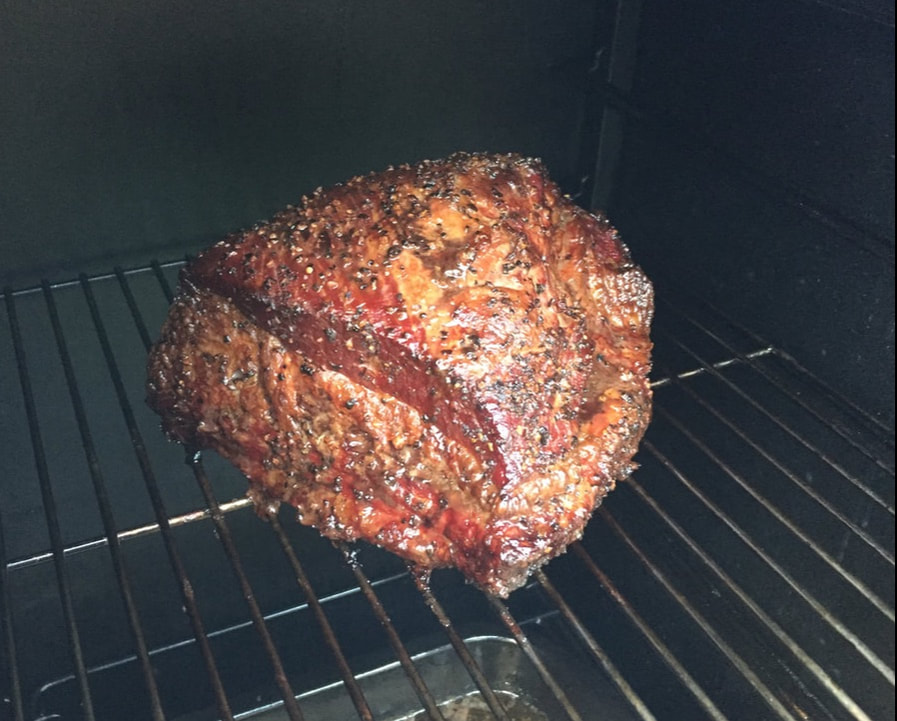
Beef brisket just before the stall
About 5 hours in to my supposed 6 hour smoke my brisket was hovering around 165 F. I had hit a phenomenon know as the brisket stall. This can occur when cooking meat low and slow with such methods as smoking. This is caused by an evaporative cooling effect from the moisture within the brisket (and the fat) escaping which in turn cools the surface of the brisket until the moisture escapes. This can take hours to overcome but eventually will pass. A quick cure to overcome the dreaded stall is called the "Texas Crutch". Simply put remove the brisket from the smoker once it reaches 165 F and tightly wrap in in aluminum foil and return it to the smoker. At this point the brisket is done absorbing the flavours from the smoking wood chips so it is not really important to maintain a good smoke level but rather to maintain a steady temperature. Check your brisket periodically until it reached the optimal internal temperature of 204 F (for me this happened 4 hours later, 9 hours into my 6 hour smoke.....). Once it is within 3 or 4 degrees of the 204 F target remove the brisket from the smoker and let it rest for 45 minutes to an hour. Letting the brisket rest will help the juices of the brisket solidify somewhat, keeping the brisket moist and locking in the flavour from the hours you just dedicated to preparing this cut of beef on the smoker.
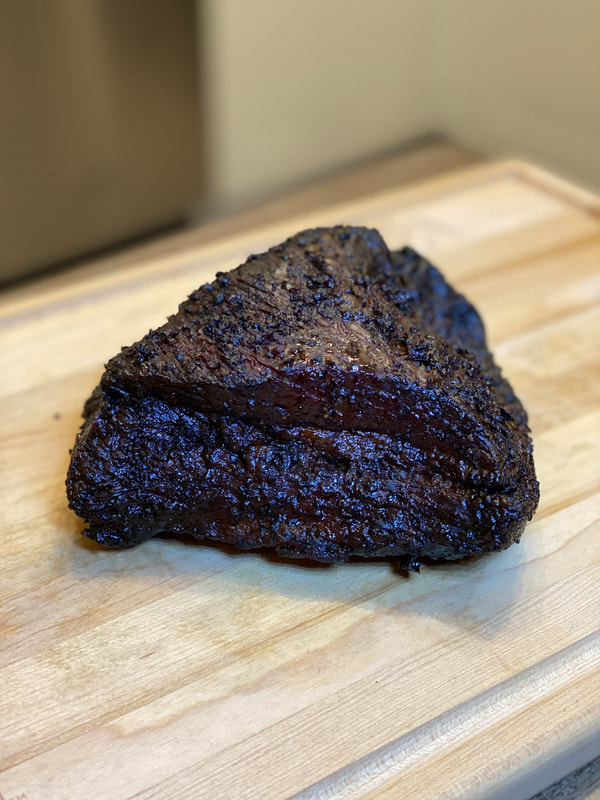
Smoked beef brisket prior to slicing
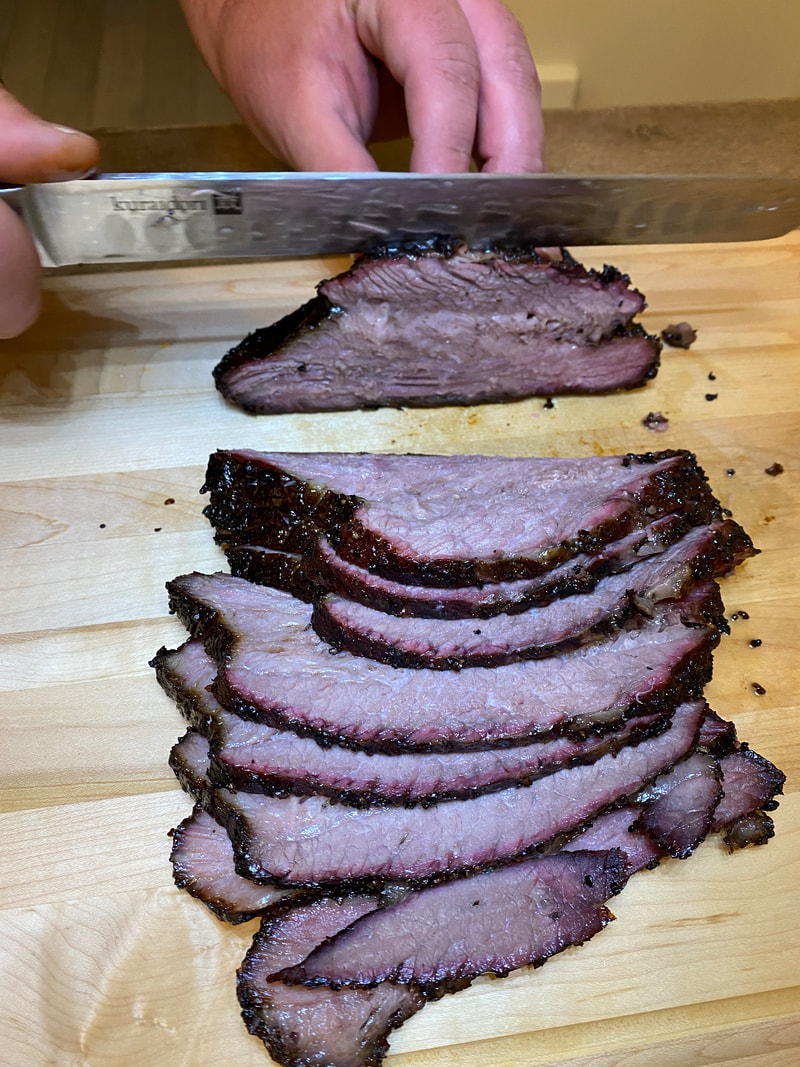
Once rested slice the brisket against the grain (this is a little more tricky with the brisket point as the two muscles converge in opposite directions, since my roast was smaller I didn't bother separating the two muscles and slicing each in opposite direction).
Slicing smoked beef brisket
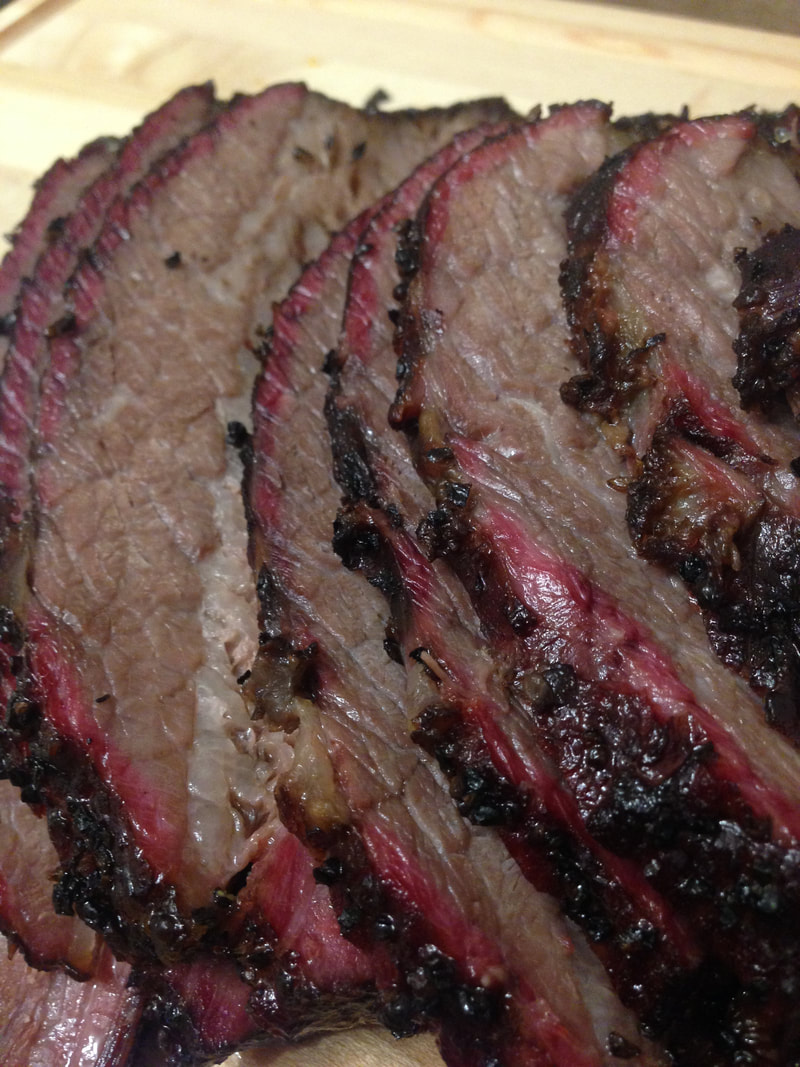
If things go well, you should have a beautiful smoke ring on the outer edge of your brisket. This is one of those things' judges look for in those brisket competitions mentioned at the beginning of this article and is considered a defining factor to whether the brisket is cooked well. Once again one of those things that meat dreams are made of.
Smoke ring on beef brisket
Hopefully, you have enjoyed #MyCanadianBeef take on smoked beef brisket. Let me know how yours turned out in the comments bellow.
2 Comments

So You Want To Up Your Steak Game, Try Reverse Sear Smoked Prime Rib Steak.......

8/5/2020

1 Comment

 
I recently acquired a smoker and decided to take my backyard steak game to the next level. The method, reverse sear smoked steak. It takes a little bit longer than heating up the grill and tossing your steak on, but the outcome is worth it. The finished product is an evenly cooked steak with a little bit of char on the outside. Rather than cooking your steak from the outside in this method flips the traditional grilling method inside out. The steak is first cooked (in this case smoked) low and slow and is pulled from the smoker right around the final desired temperature of your finished steak. Then the steak is placed on a high heat grill to add some char marks and finish off the last few degrees of the final cook. I have invited friends over and they have all said, "This is the best steak I've had in my life".
Picture
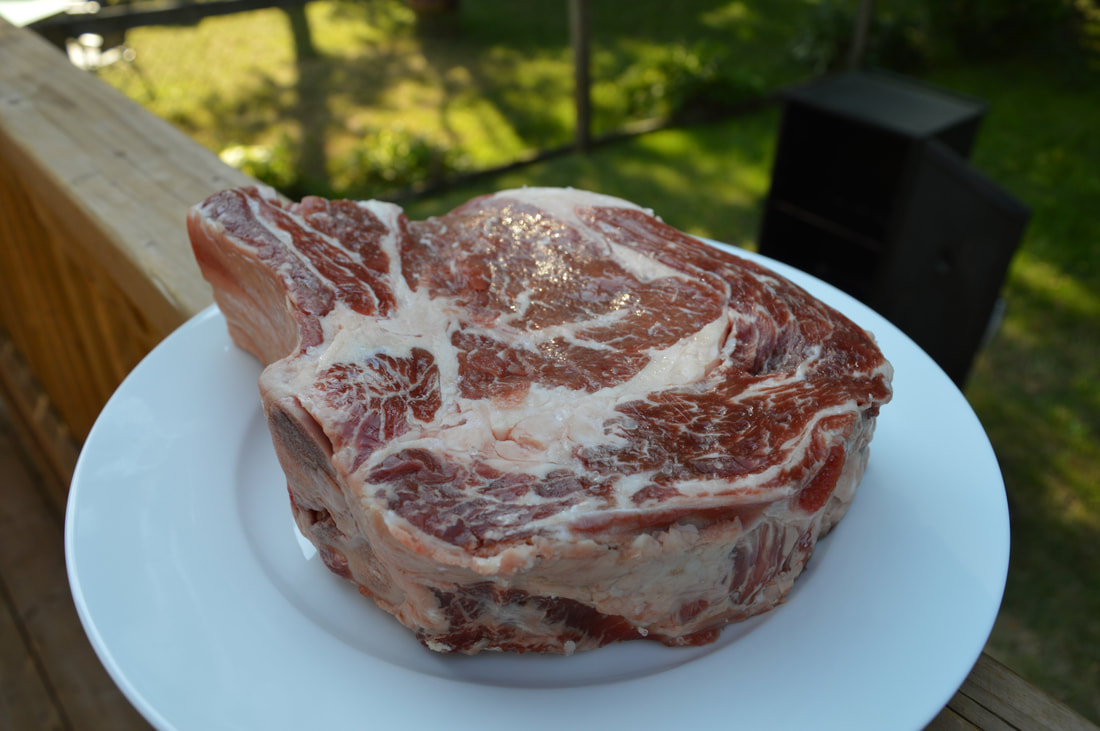
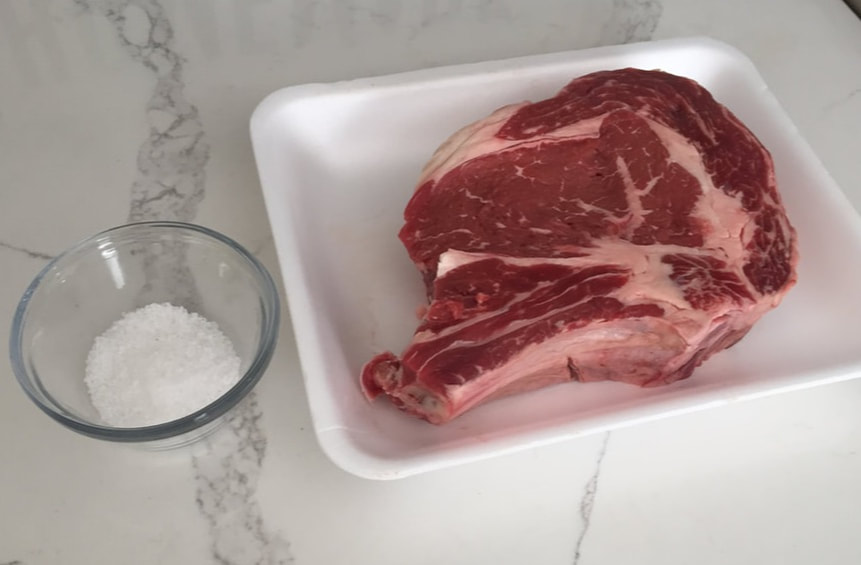
The first step to the perfect reverse seared smoked steak is to pick a thick steak. I decided to go with a 1.5-inch bone in rib eye steak (truth be told it was more of a prime rib roast than a steak). Thickness matters for this cooking method. A thin steak will turn out dry if you do not pull it off the smoker at the exact right moment. I have learned it is better to carve a thick steak and share it with your guest rather than try to serve everyone an individual steak. It also makes for a nice presentation when served on a platter or a cutting board family style.
The method is very simple. A few hours before getting the smoker prepped lightly sprinkle your steak with some kosher salt and place the steak in the fridge.
Picture
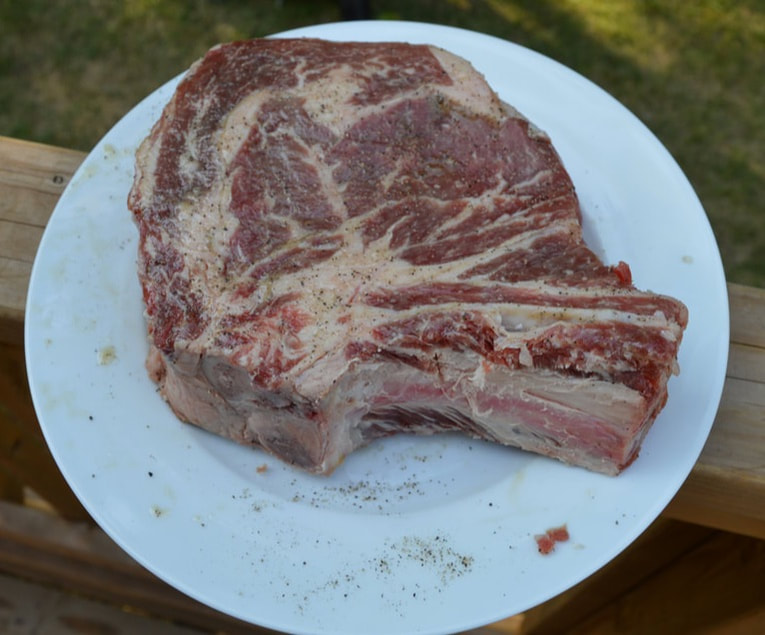
Pre heat your smoke to 225-250 F. If your smoker has a water pan add an inch of hot water to it just as your pre heat the smoker. If it does not have a water pan use a disposable tin foil pan with an inch of hot water in it, placing in directly under the area where you will place your steak. The water will help regulate the temperature creating an even cooking environment in your smoker as well as helping the smoke stick to your meat. When the smoker almost reaches the temperature add your wood chips. I decided to use whiskey barrel wood chips (Oak) with a little mesquite chip mix. Just before placing the steak in the smoker lightly rub some olive oil on it and season with black pepper. I placed my steak almost right from the fridge onto the smoke. There is no need to bring your steak up to room temperature for two reasons. The smoke tends to stick better to the cool steak and you can keep food safety a priority by not letting your steak sit in the danger zone growing potentially harmful bacteria while you wait for it to acclimatize to room temp.
Picture
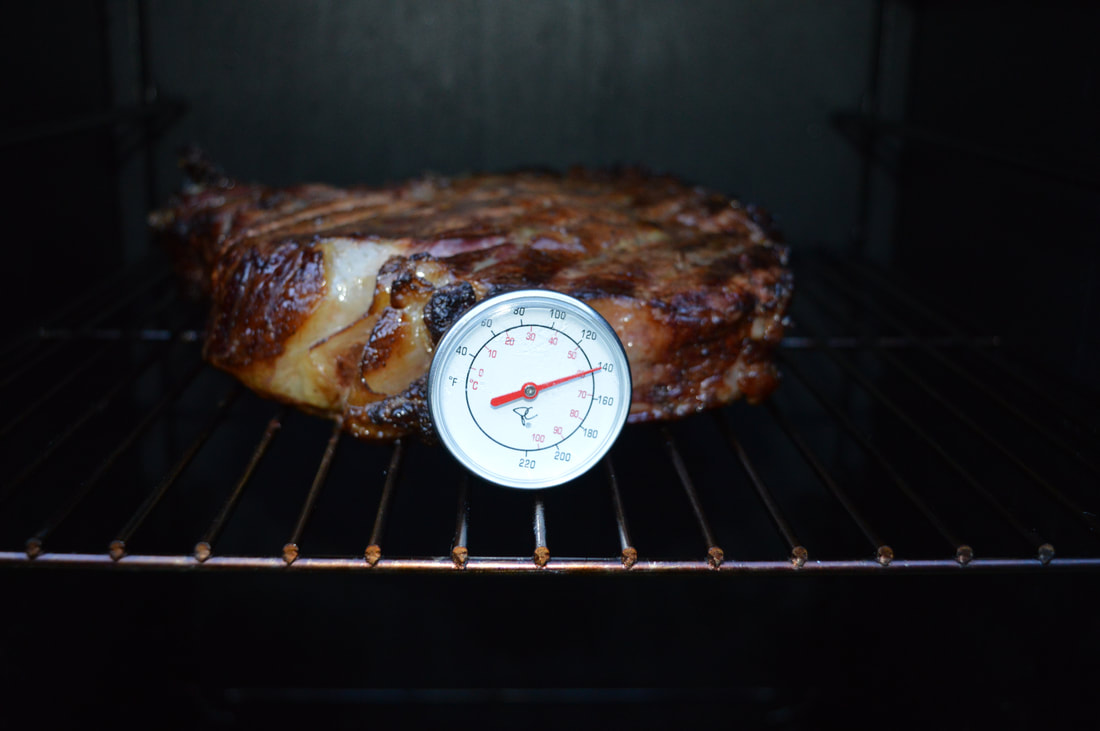
Place your steak on the middle rack of your smoker and maintain the smoke and 225-250 F temperature for about 90-minutes to 2 hours. I was going for a medium rare to medium cook. I pulled the steak once it hit 140F checking with a meat thermometer every so often after the 90 minute mark. Try to place the meat thermometer in the middle of the steak (keeping it away from the bone) to get the most accurate reading. A digital probe style thermometer can be a useful tool when smoking because every time you open the door or lid of your smoker you will let the heat out and it will take time for the temperature to return to where it was. As the saying goes "if you're looking then you're not cooking".
Picture
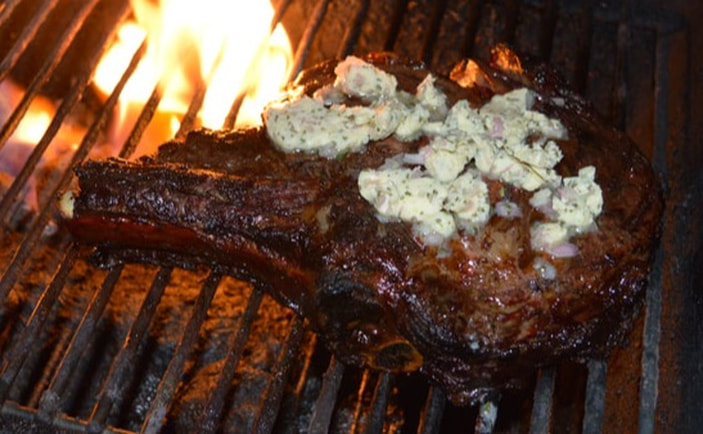
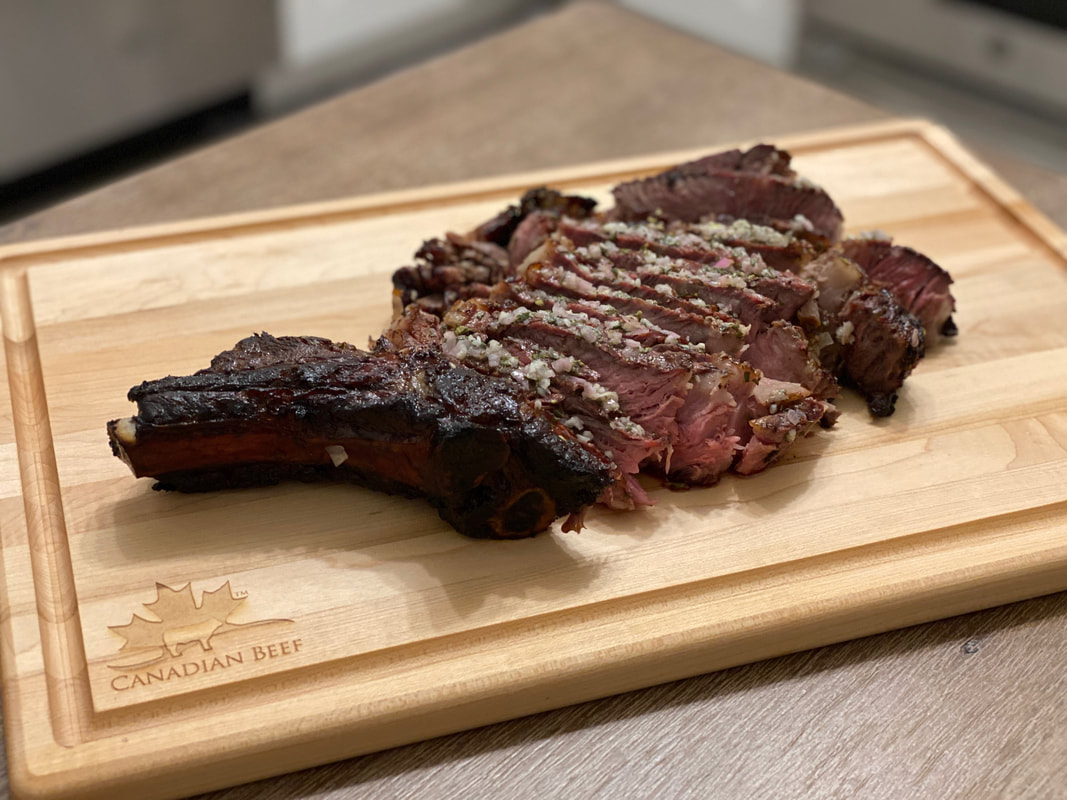
Around the 90-minute mark I preheated my propane grill to a high heat (approximately 500 F). Once the steak hit my desired temperature, I transferred the steak to the grill and seared each side for about 4 minutes per side. I decided to top my steak with a compound butter. (Find the recipe here: www.jayeatz.com/blog/so-you-want-to-up-your-steak-game-try-making-compound-butter)
I sliced the compound butter into medallions and topped my steak with it the last minute before I took it off the grill allowing it to slightly melt.
Picture
Then I let the steak rest for 15 minutes, allowing the compound butter to further melt, and the juices of the steak to redistribute back into the steak before slicing. 
Picture
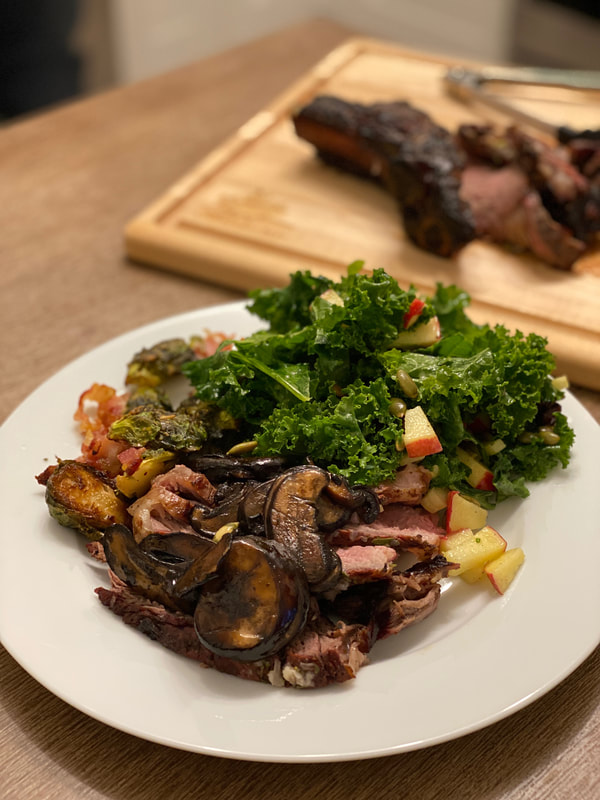
I decided to pair the steak with fried mushrooms and a kale salad recipe I discovered on the ROUNDUP app from Canadian Beef canadabeef.ca/recipes/beer-soaked-beef-rotisserie-roast-with-skillet-corn-kale-salad/.
Picture
Wow your friends with a reverse sear smoked prime rib steak at your next backyard cookout. 
1 Comment

So You Want To Up Your Steak Game? Try Making Compound Butter.......

8/4/2020

2 Comments

 
Are you looking to elevate your next backyard BBQ steak to that steakhouse quality steak? A quick and easy way to finish that steak off and bring it to the next level is by simply topping it with a little homemade compound butter right at the end.
What is compound butter you ask? Simply put it is  a mixture of butter and other ingredients. These other ingredients are whipped into the butter, reformed in plastic wrap, chilled, and then melted onto meats (steak in this case) or into various sauces. It is relatively simple to make and infinite combinations of flavours can be added to the butter to compliment whatever meat you are serving.
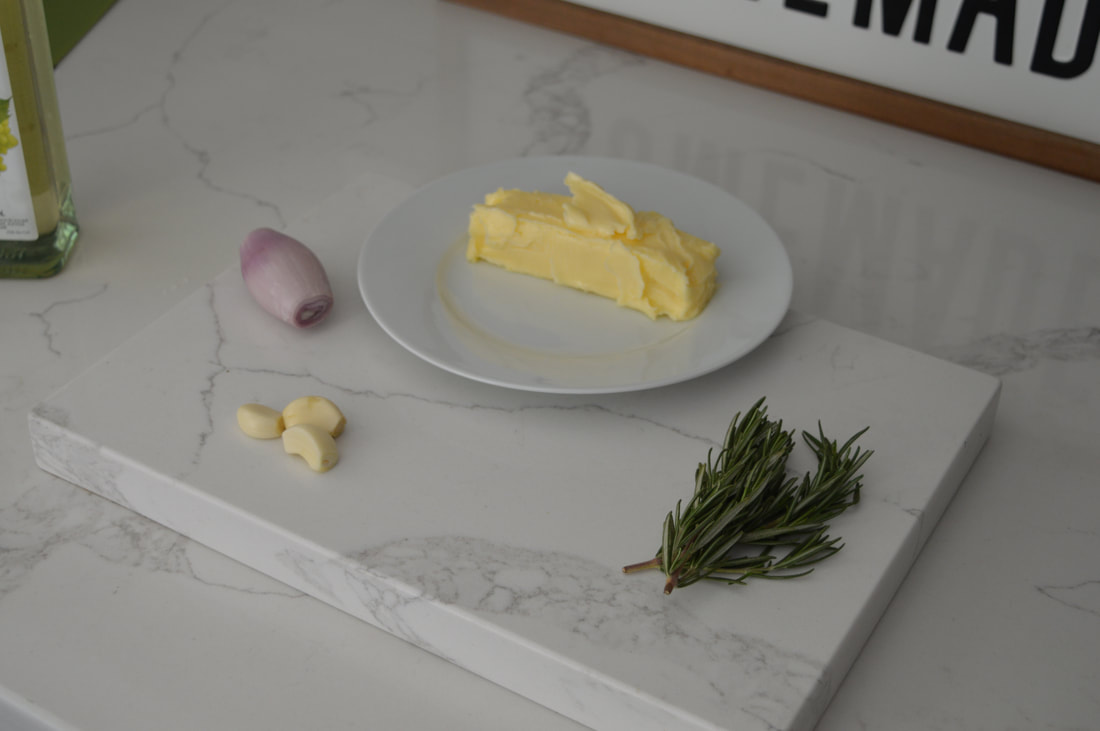
butter and herbs on a platter
Since I was making steak, I decided to infuse flavours that would complement steak into my compound butter such as rosemary, garlic and shallots. Here is what you will need:
Ingredients:
  • 1/2 cup of salted butter (1 stick) room temperature 
  • ​2 TBSP minced garlic 
  • 2 TBSP finely chopped rosemary
  • 2 TBSP diced shallot
  • 1 TBSP white wine vinegar
Directions:
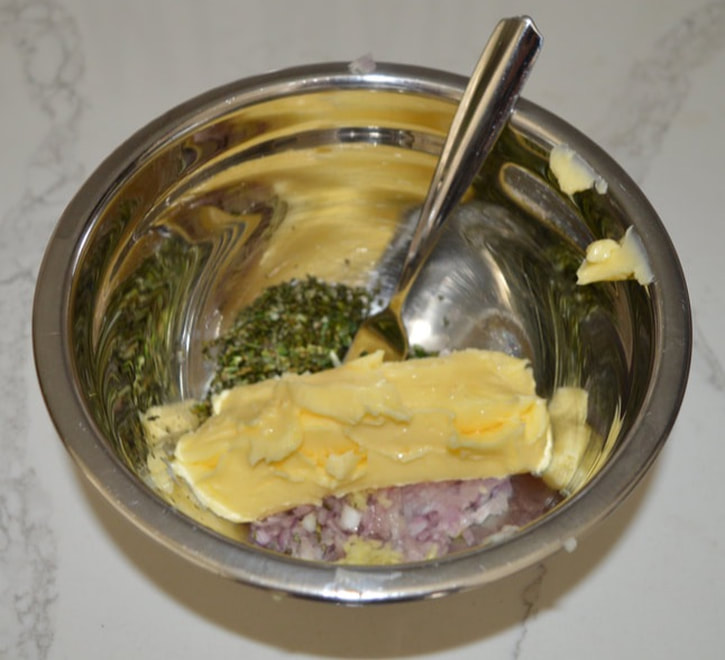
Place room temperature butter in a small mixing bowl. Mix all ingredients thoroughly into the butter.
Ingredients in a mixing bowl

Read More
2 Comments

So I Made Chicken Ribs, Yes These Do Exist.......

8/9/2016

1 Comment

 
Picture
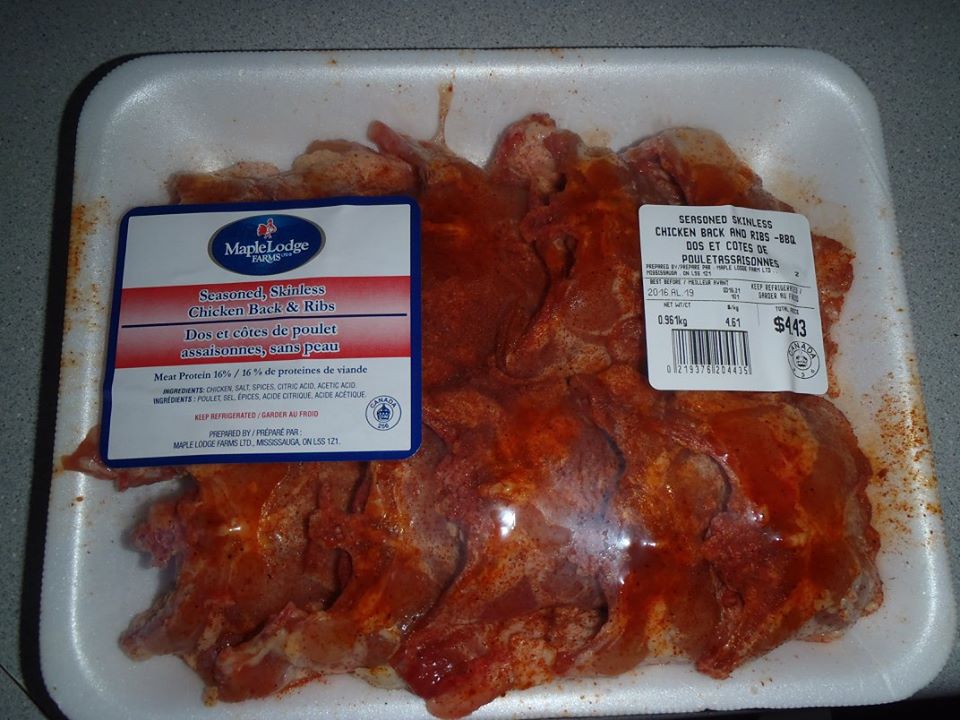
     You may have heard about chicken wings or pork back ribs but what about chicken back ribs?  Maple Lodge Farms has created this amazing chicken wing alternative.  They have called them "Seasoned, Skinless Chicken Back & Ribs" but Jay Eatz is going to shorten it to chicken ribs.  I have tried these a few times and would put them right on par with chicken wings.  I like the white meat and the flavour that the rib bones infuse into the meat. One thing chicken ribs have over chicken wings is the price, I paid $2.09/lb (compare wings at $4.99/lb).  They are also very BBQ friendly and easy to make.
     I preheated the BBQ to medium.  Then placed the chicken ribs rib side down on the grill.

Read More
1 Comment

So One of my Students Wanted an Easy BBQ Baked POTATO Recipe, It Doesn't Get Much Easier Than This....... 

8/2/2016

2 Comments

 
Picture
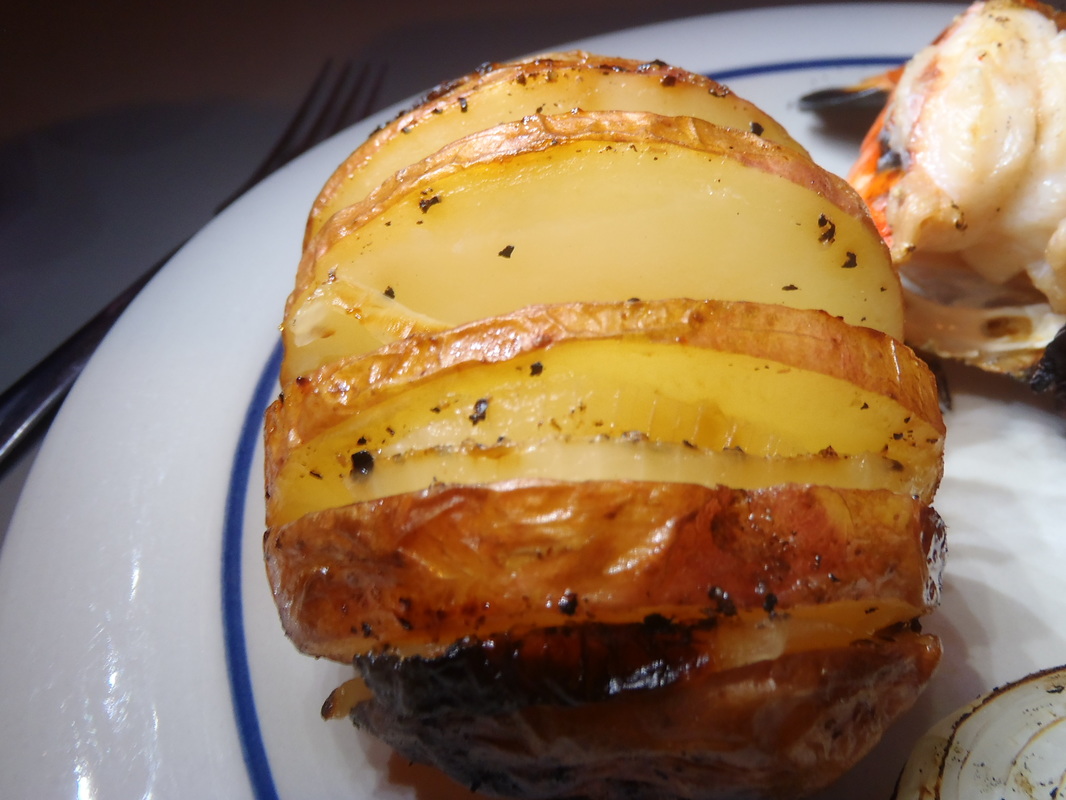
     During my last BBQ Spices and Rubs cooking class one of my students asked about doing baked potatoes on the BBQ.  We talked about twice baked mascarpone cheese baked potatoes which are amazing but not something you would throw on the grill every night.  What about something way easier and less expensive?  My easy BBQ baked potatoes elevate a simple baked potato to another level with few ingredients and even fewer minutes of prep time.
Ingredients:
  • 1 Potato per person (I used red potatoes)
  • 1 Onion
  • 1/2 Clove of garlic per potato
  • Stick of butter 
  • Salt and pepper to taste
Instructions:
Rinse and wash the potatoes and cut off any sprouts or bad spots.  Using a pairing knife, cut into the potato on a slight angle about half way through starting close to one end of the potato.  Now make another slice adjacent to the previous slice creating a small wedge in the potato being careful not to slice all the way through the potato.

Read More
2 Comments

So You Could Use a Guide To Buying & Cooking Canadian Beef? There's An App For That.......

3/31/2016

1 Comment

 
Picture
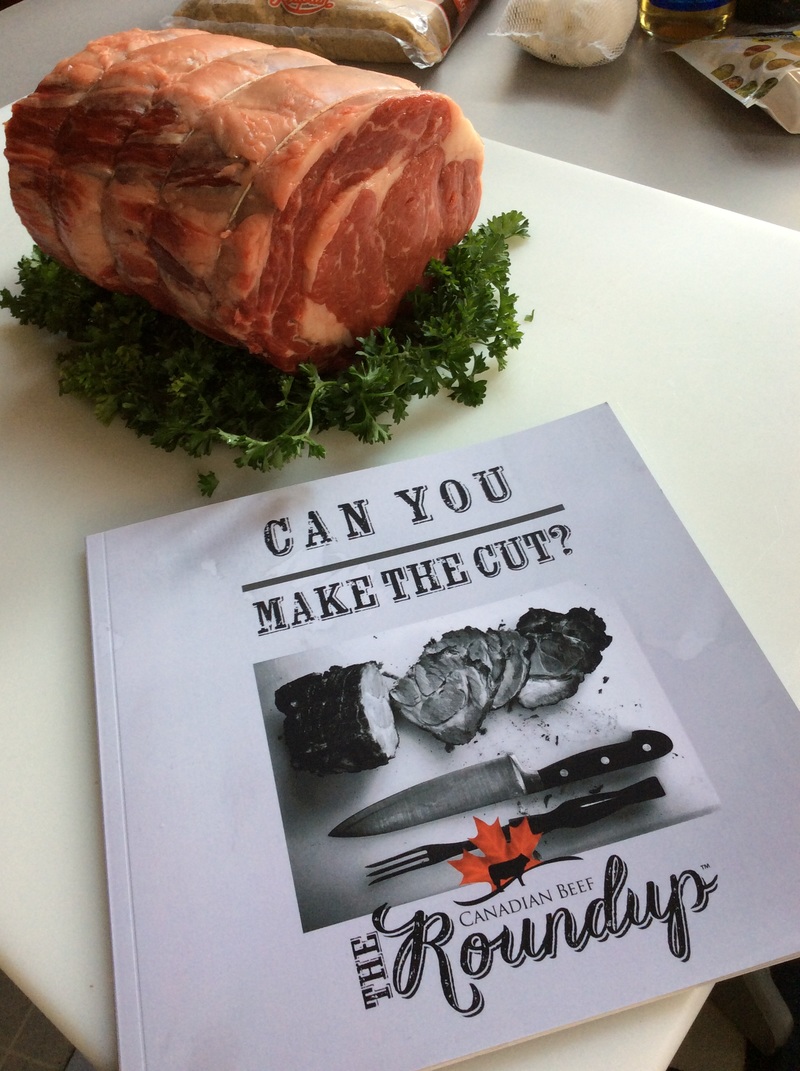
     I was recently selected to take the "Can You Make The Cut?" challenge.  My mission: execute a challenging recipe featured in the Roundup App, a one of a kind app with a focus on what cut to buy and how to cook it.  This post is sponsored by Canadian Beef and I am being compensated monetarily and with groceries (don't tell the Canadian Beef people but I would have done it for the free beef). 
     Buying beef can be intimidating with all the choices available.  What if you are a late night shopper and the butcher has gone home for the day?  What if you shop at a budget grocery store that brings in pre-packaged meats and there is no butcher at all?

Read More
1 Comment

Spices and rubs: make the difference between a masterpiece and just another cookout.  Find out the secret ingredients you can use to add rich, deep flavour to your next barbeque.

10/1/2015

2 Comments

 
     To the regular followers of Jay Eatz you may be wondering why this post hasn't started with "So......."?  Jay Eatz has been instructing various cooking classes and has promised his students he would make the recipes and relevant course content available via the inter-web.  So rather than "So I taught BBQ spices and rubs class last night......." the post title follows the course description to make it easier for participants to find.  With that said here goes.

The first 2 rubs come courtesy of The BBQ Pit Boys, for other recipes from them visit http://bbqpitboys.com/.

Coffee Dry Rub Recipe

Read More
2 Comments

So I used Culantro instead of Cilantro in my Chimichurri Marinade, acceptable Error.......

8/27/2015

1 Comment

 
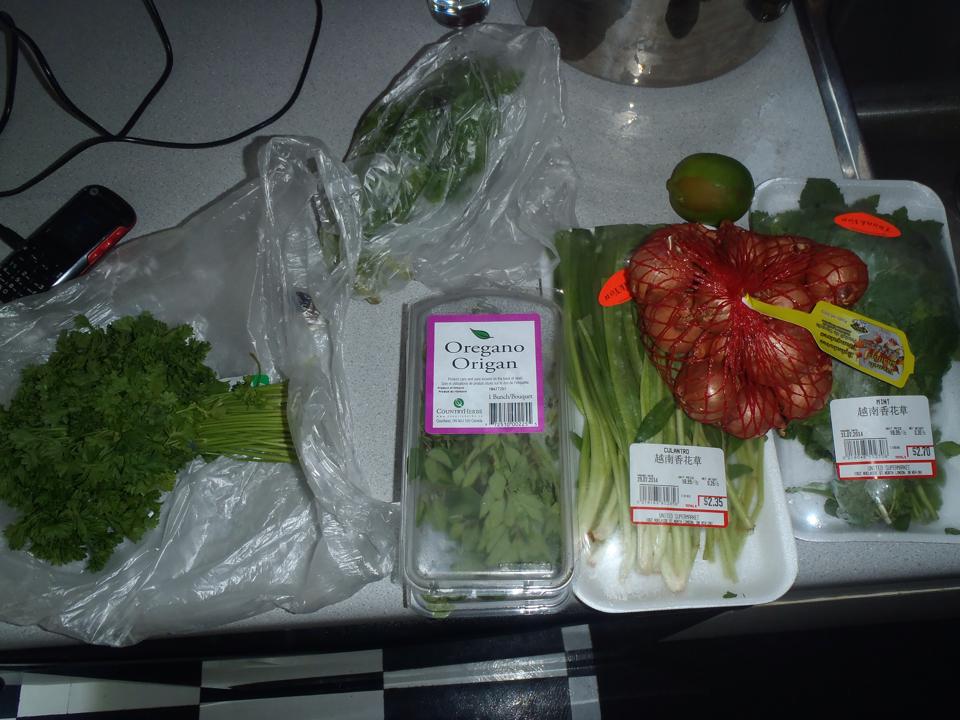
     I enter a beef cook off BBQ competition most years and decided to give Chimichurri beef a go.  I was in a rush the day before out buying ingredients for the Chimichurri marinade.  The recipe called for cilantro and the first store I went to was sold out.  I figured the Asian supermarket would have it because they have almost anything and everything.  In my rush I accidently picked up a pack of culantro instead.  Lucky for me culantro has a similar flavour profile to cilantro; it's just more pungent and stronger.    
Picture

Read More
1 Comment

So I Made Jerk Marinade From Scratch.......

8/25/2015

1 Comment

 
     The good people at Grace Foods http://gracefoods.ca/ make an excellent bottle of Jerk Marinade for about $4.00.  This is usually my got to ingredient when I'm feeling jerk chicken.  You buy it, open the bottle and it's ready to use, convenience factor +10. 
Picture
     There is another way, all you need is about 16 ingredients and you're almost there (this is why Grace Foods is in business).  It will cost around $15 to make if you have some of the spices on hand, if you need everything expect double to triple that number.
Picture

Read More
1 Comment

Impress your friends and family this summer with new tips and techniques to cook and grill on your bbq......

6/12/2015

4 Comments

 
       BBQ vegetables, steaks, burgers and more.  Before.....
Picture
       After.......
Picture

Read More
4 Comments

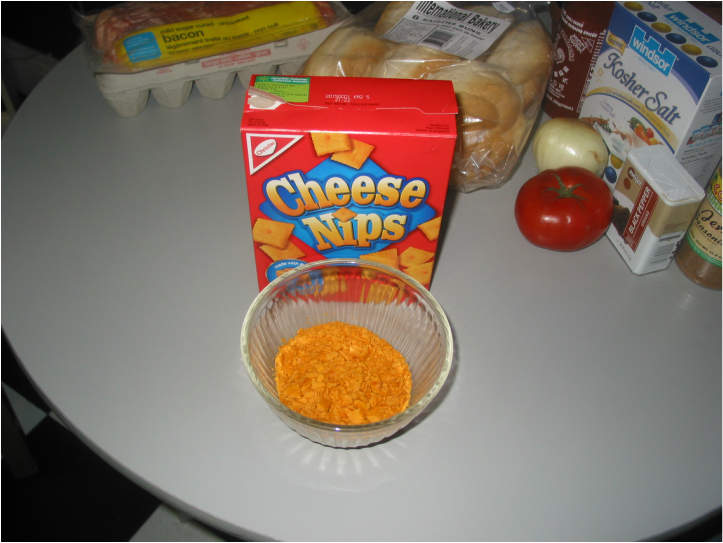
So I made HOMEmADE burgers, secret ingredient, cheese nips.......

5/5/2015

11 Comments

 
       That's right, Cheese Nips, the perfect ingredient for some cheese burgers sans cheese.  Probably not going to make the list of the healthiest burger but that wasn't going to happen with the burger toppings I had in mind anyways.  Here is what you will need:
Picture

Read More
11 Comments

So It's Rib Night, try Jay Eatz's Triple Threat Ribs.......

4/21/2015

2 Comments

 
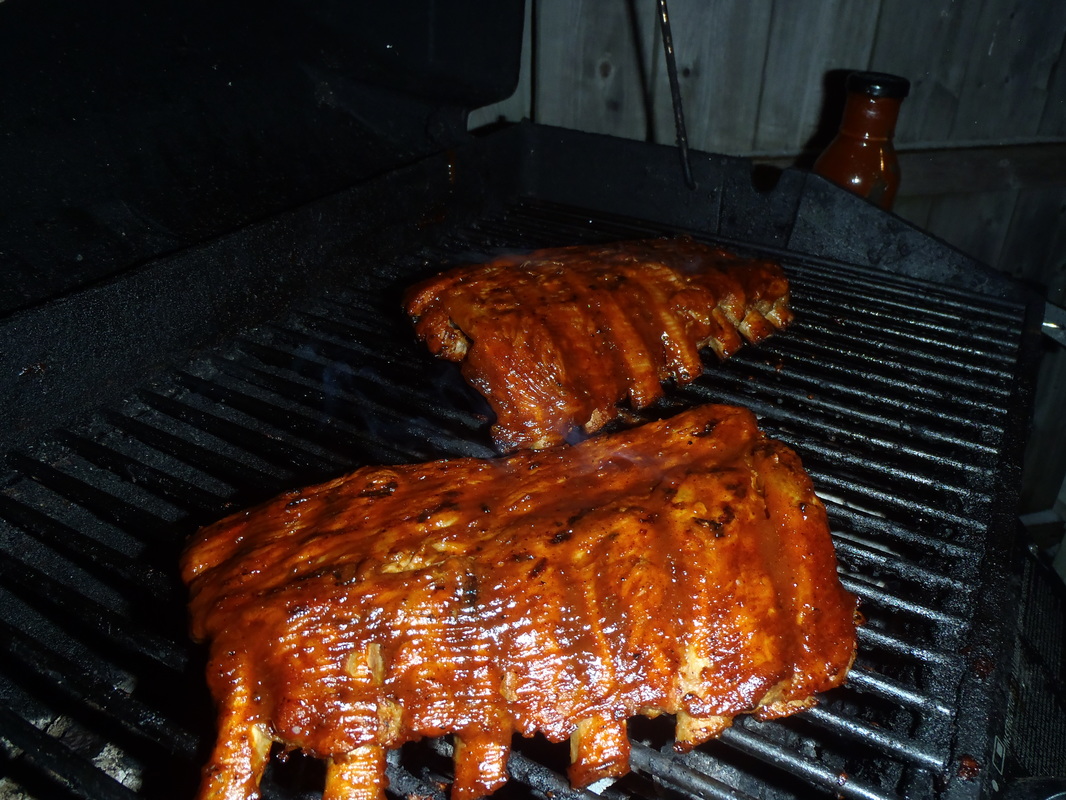
       Everyone loves a good rack of ribs, that's why Rib Fests are so popular.  Every summer almost every city dedicates a weekend to celebrate the "RIB" but Rib Fests can be pricey, you can do it at home just as well if not better and who wants to wait for Rib Fest to enjoy a good rib?
Picture

Read More
2 Comments

so i decided to bbq something that usually goes in the oven, Carib Lager bbq braised beef shank.......

3/19/2015

5 Comments

 
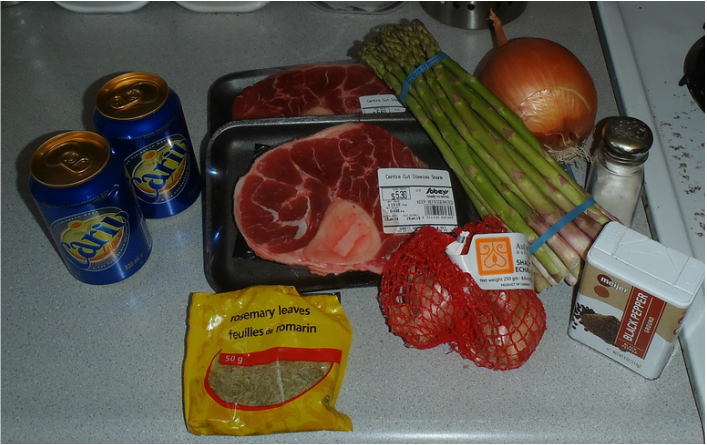
       That's right Carib Lager BBQ beef shank.  My original intentions was to show case another under $6 a plate dish.  I figured something from the hooves or ass section of the cow would be my best bet.  I went slightly higher than the hoof and decided on beef shank but guess what?  Beef is expensive in Canada no matter what cut you are getting.  The shanks were one of the more reasonable cuts but still $12.10/kg.  I purchased two pieces costing slightly over $5 and weighing in at almost a pound each.  So the $6 a plate idea quickly went out the window.  I think this dish is coming in at about $10.50 per serving not including the two + hours of propane but hey, it was good.   
Picture

Read More
5 Comments

so its f'n cold out and jay eatz is bbq'in steak.......

3/3/2015

5 Comments

 
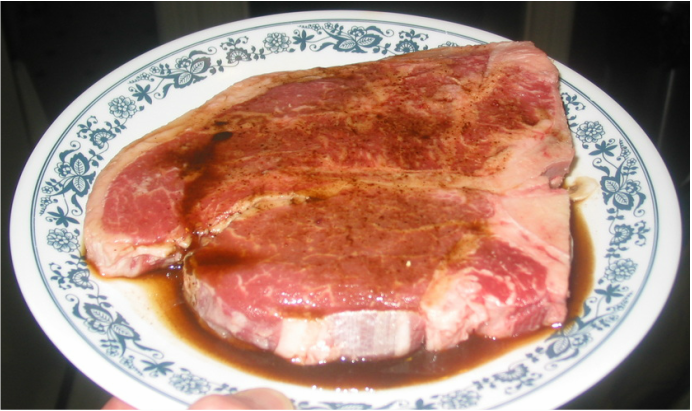
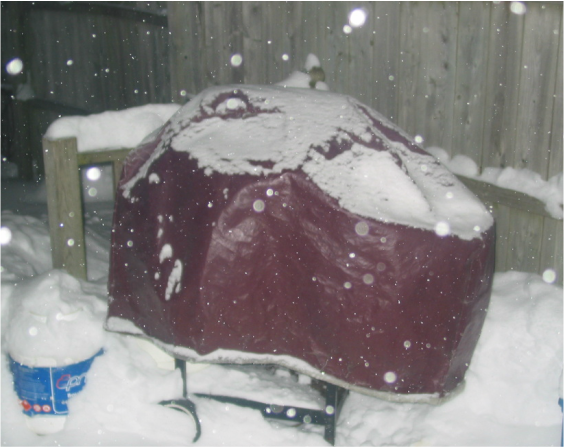
       If you are a true Canadian there is no end to BBQ season.  As long as you can shovel a path to the grill and have propane it's on.  On a brisk Canadian evening (and by brisk I mean -22 feels like -35) I cleared my path to the BBQ to grill up a t-bone and some zucchini.  Indoors I fried up some mushrooms to go with this BBQ delight.  

       First thing I did was rinse of my t-bone under the tap (as Jay Eatz has said before you never know where your steaks been before you've bought it) and marinated it in some Worcestershire sauce.
Picture
       While the steak was doing it's thing in the marinade I ventured out into the cold to clear the snow of the BBQ and get it started so it would be nice and hot by the time the steak was ready to hit it. 
Picture

Read More
5 Comments

So I turn the BBQ on at 7:04 and dinner was on the plate at 7:32 for about 4 bucks......

1/27/2015

1 Comment

 
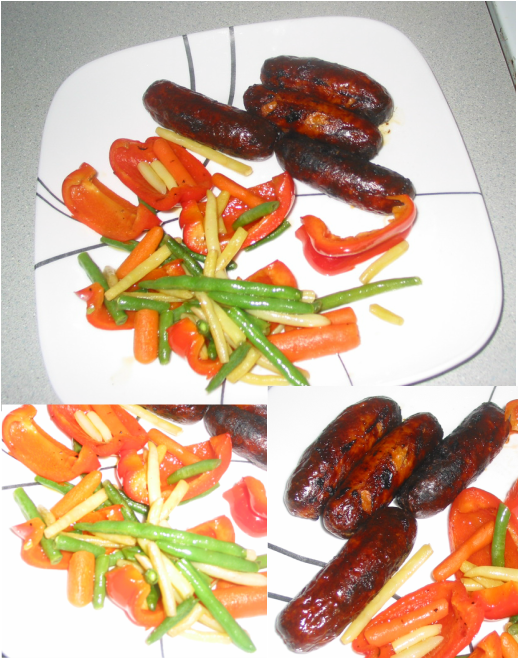
       The weather outside is frightful but BBQ is so delightful and for 4 bucks how could one say no.  Feels like -21 outdoors might discourage some people, maybe our neighbors to the south currently experiencing their "nor'easter", but in Canada it's still prime time BBQ season.  The key is to keep it quick and simple on the colder days.  It's not the best time to do a 3 hour roast on the grill or anything that needs constant babysitting and will make you sit outdoors for the entire BBQ process.  I recommend simple items that you are familiar with grilling times to minimize outdoor time.  Two flip burgers or steaks make an excellent choice.  I opted for sausage which also kept the budget low like the temperature.

        I hit the grocery store up and scored a dozen hot Italian sausages for $7 which is about 60 cents a link.  Divided the pack into 3 parts, froze 2 bags of 4 and kept the other third ready for the grill.  I also picked up a small red pepper for about a dollar.  I looked in the freezer and saw a bag of mixed veg which consisted of green beans, yellow beans and carrots ($2.89 for entire bag, I used 1/5). Having my game plan established I fired up the grill at 7:04.  By 7:07 all the snow and ice on the lid had evaporated so the links were ready for the grill.  I placed them on and went inside to deal with the pepper.  I cut out the stem, de-seeded the pepper and cut it into about 6 pieces.  

         By the time this was done the sausages were ready for a turn.  Then I threw a handful of the frozen veg mix in the fry pan with a splash of olive oil and set it to low.  Back out to turn the sausage again, approximately 7:21.  At this point I added the red pepper to the grill, about 2 mins a side with the lid down.  When I turned the pepper I rotated the sausage.  In between the flips I transitioned the fry pan from low to medium and gave the veg a toss and a sprinkle of salt.  Then back out to pull the peppers and give the sausage one final turn.  Time, about 7:26.  The peppers joined the veg in the frying pan, tossed a few times to cover with the oil and seasoning.  Back out to the grill and sausages were done, shut down the propane, pull sausage and head indoors.  It's about 7:31 and the plate the sausage walked threw the door on is now the vessel for the veg on the fry pan.  7:32, sit down with knife and fork, a condiment or 2 for the sausage and enjoy.     

         Alternative, put key in ignition.  Drive to fast food place, drop $6 to $10 on a combo and maybe complete food run in 20 mins instead of 28.  Not tonight.
Picture
1 Comment

    Author

    Jay Eatz is passionate about all things food and welcomes you to explore all thing "Eatz" with him. 

    Picture

    RSS Feed

    Categories

    All
    BBQ
    Cooking Classes
    Dessert Recipes
    Recipes
    Restaurant Reviews
    Slow Cooker
    Travel

    Enter your email address:

    Delivered by FeedBurner

    Picture
© COPYRIGHT 2015. ALL RIGHTS RESERVED.